While traveling through the Patagonian region of South America, I encountered many a befuddled traveler who was a bit miffed by the planning process required to enter Torres del Paine National Park. I will go ahead and include myself in this stack of confused, well-intentioned hikers. For years I have fawned after photos of Torres del Paine, but it wasn’t until I actually started the process of researching how exactly to pull off a visit, did I meet the gut-sinking moment of “Oh, no. I’m too late.”
It’s really an awful feeling to have as a traveler. The stars have finally aligned in life, and you are on the cusp of departure, only to stumble across this one little detail that has the potential to derail everything. Reservations? You need reservations? I simply was unaware. Now, with that said, the 2016-2017 season is the first year to see the implementation of required reservations prior to entering the park. I was not the only one caught in the crosshairs of a new system.
Torres del Paine National Park is one of the premiere hiking destinations in all of South America, and with the influx of new visitors, restrictions on how many people can enter the park are being put into effect. It is understandable, and long term, definitely a good thing to protect the fragility of the park. I am hopeful that as word spreads, more travelers who wish to enter the park will be aware of the requirements, and less headaches will abound for everyone.
With that said, I was able to finagle dates in the tail end of February to make my “O” trek a reality. Below I’ve put together a guide that will hopefully streamline the leg work required to visit such an incredible destination. Take a gander, and hopefully it will allow you to spend less time planning, and more time enjoying your visit!
When is the best time to visit?
There isn’t exactly a correct answer to this, but the Patagonian summer lasts from December to March. This is when the park sees its highest number of visitors, and when you will have the most difficultly getting reservations. Book early if you want to visit during peak season. If you are in search of solitude, this would most assuredly NOT be the time to come visit. If anything, I am very curious about about the shoulder seasons, as I think you’d run into less people.
What city do I need to start in?
There are two different airports that you can fly into. Puerto Natales or Punta Arenas. During high season, you can fly directly into Puerto Natales which will save you a 3-5 hour bus trip from Punta Arenas. Puerto Natales is often referred to as the gateway to Torres del Paine, and it will serve as your home base prior to entering the park.
Are there supplies available for purchase in Puerto Natales?
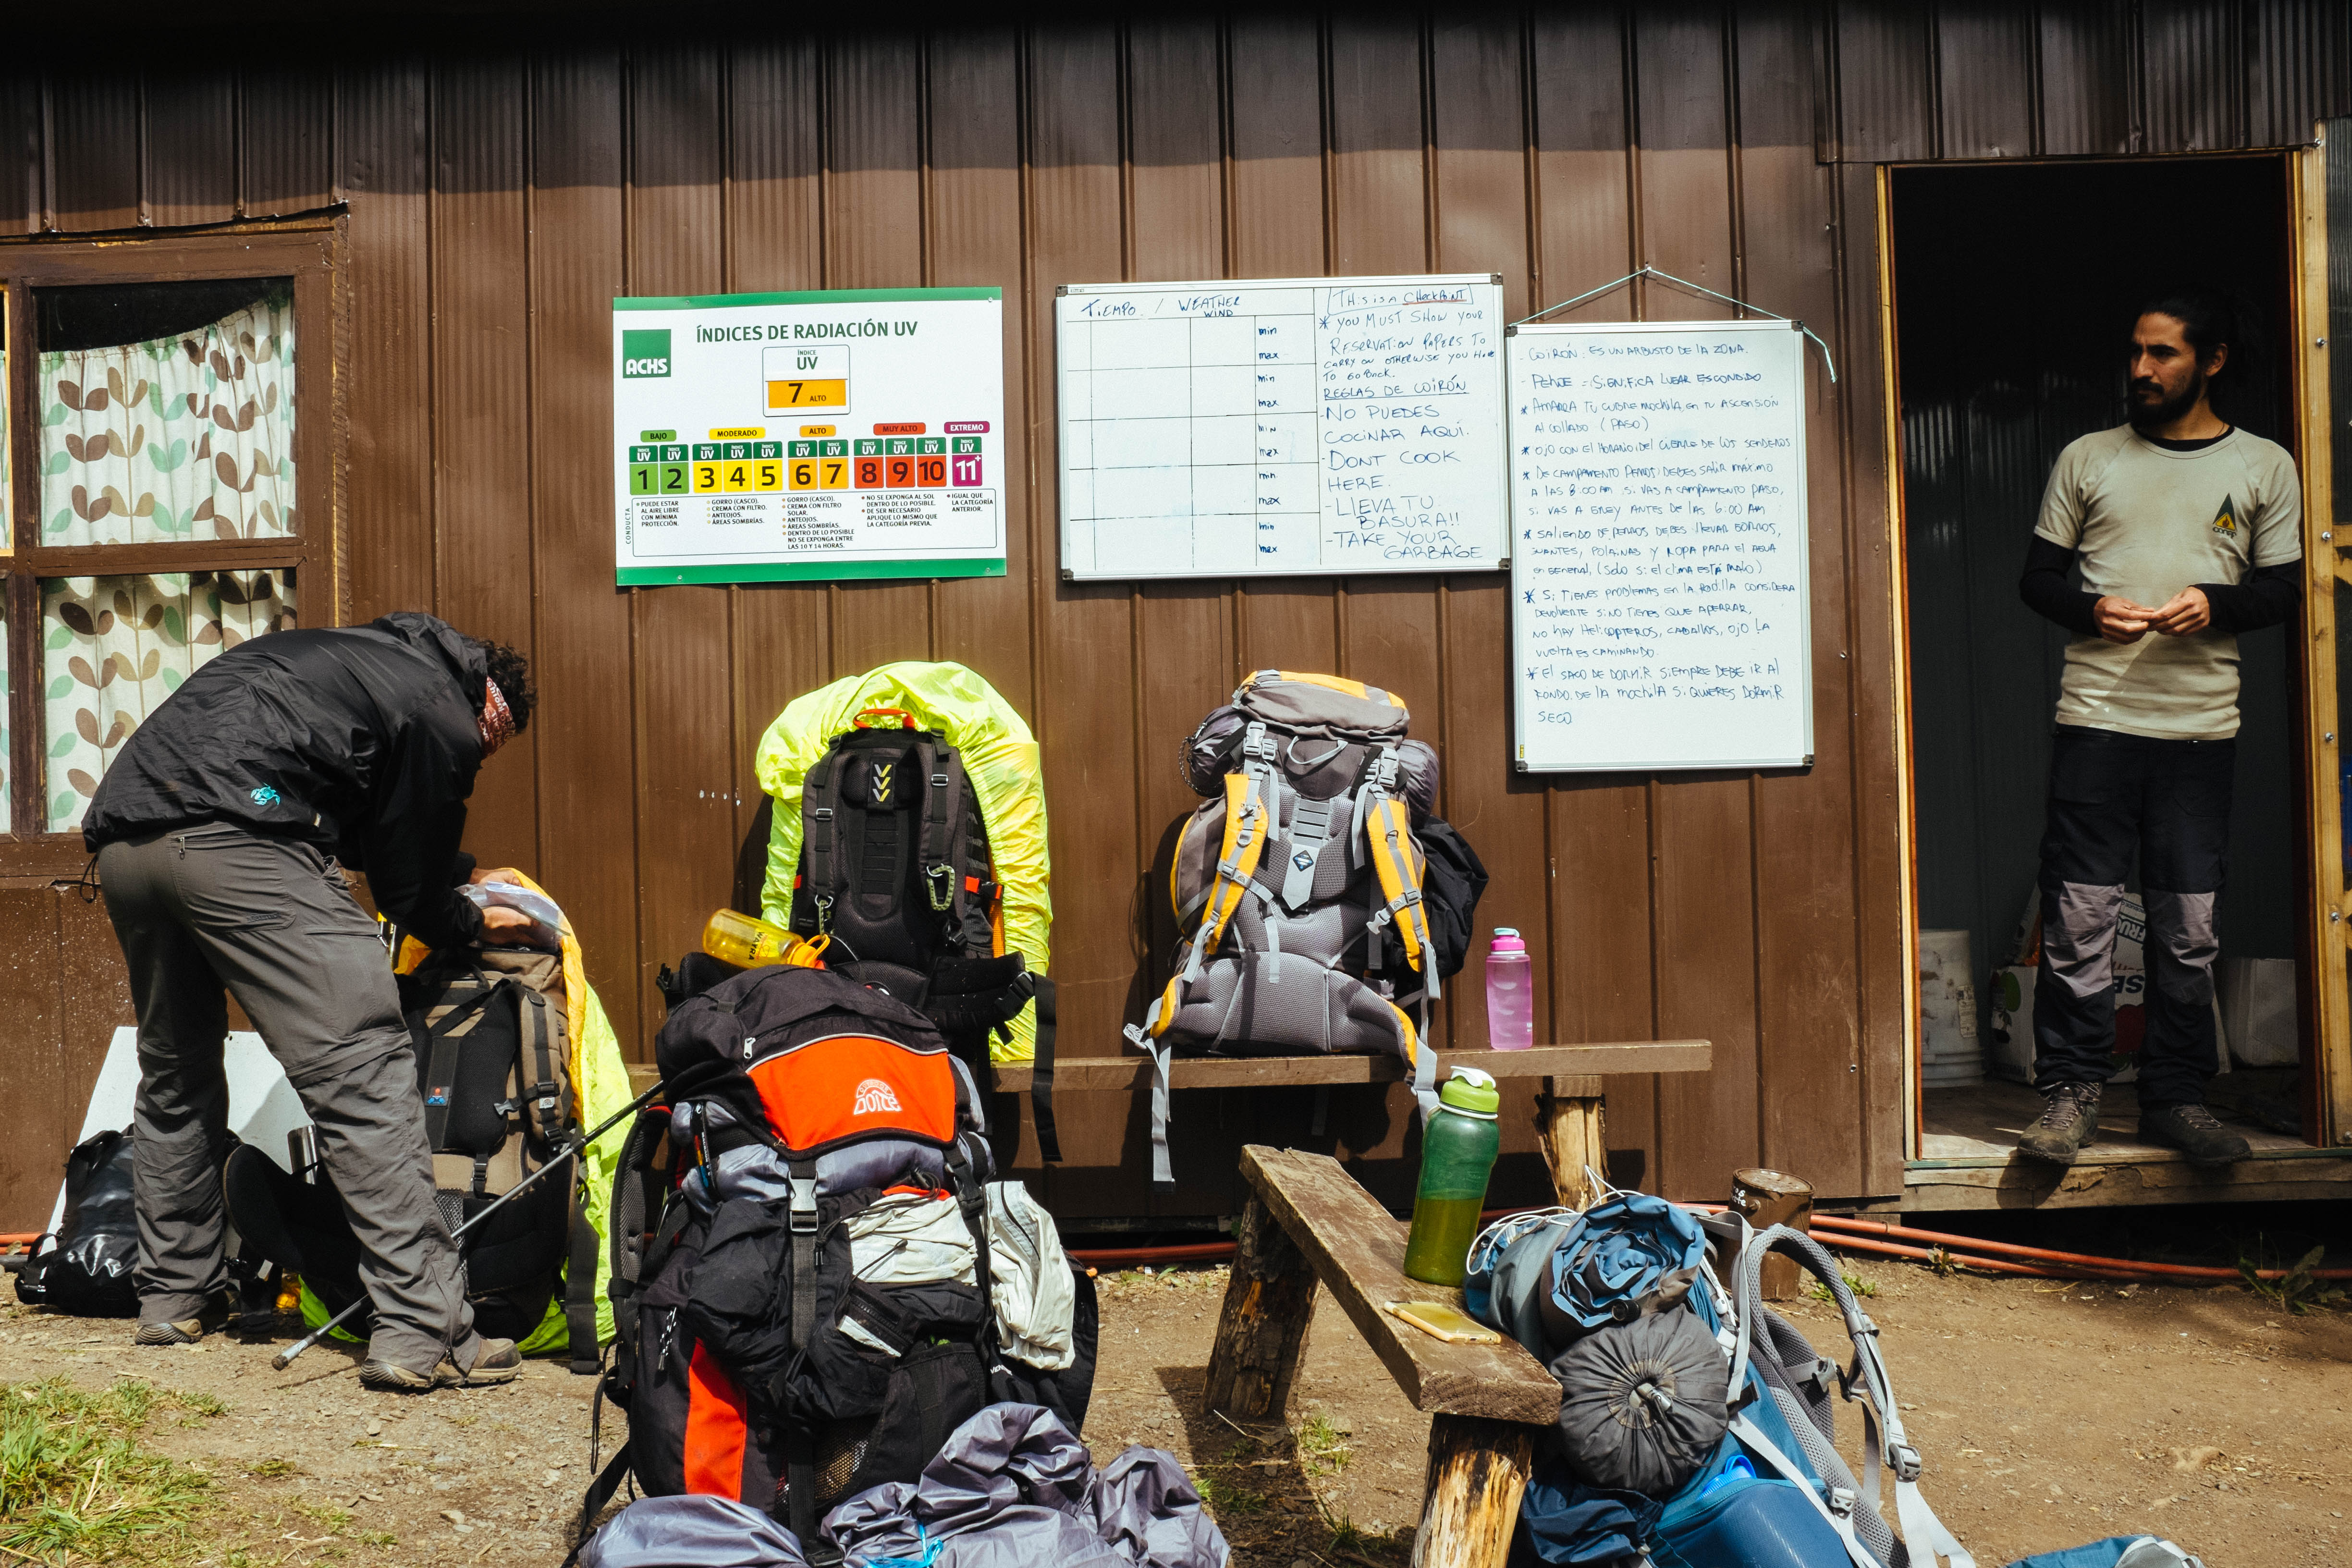
Yes. The town is well equipped to outfit you with any and everything you might need to do a weeks worth of hiking in Torres del Paine. I would suggest outfitting yourself with anything you might need gear wise, prior to arrival, to avoid the markup. The option to rent backpacks, tents, hiking poles, really whatever you need, abound. There are plenty of shops to purchase fuel canisters, so no worries there. There are two main grocery stores, and many smaller stores specializing in mixed nuts, dried fruit, etc. Instant rice is not a thing here! Nor is jerky, which I was mildly sad about. If you have any special dietary restrictions, I would suggest purchasing those items prior to your arrival in Puerto Natales, to avoid any snafus. I assure you that your hostel will be able to point you in the right direction of your needs.
How do I get from Puerto Natales to Torres del Paine?
Roundtrip bus tickets can be purchased for CLP $15,000. There is a morning and an afternoon bus into the park. Ask your hostel for specific timings, as they are subject to change. These tickets can be purchased at the bus terminal, or from just about any hostel. The return ticket is left open ended intentionally. From Puerto Natales, it takes about 1.5 hours to reach Torres del Paine. The first stop is Laguna Amarga where you will deboard, pay the entry fee, and do a bit of paperwork.
How much does it cost to enter Torres del Paine?
As of writing, during the high season it costs foreigners CLP $21,000 to enter the park. During low season this price drops to CLP $11,000. Depending on your itinerary will determine if you get back on you bus, or if you start your journey here. For hikers of the “O,” this will be where you start your hike. There is a mini-bus available for CLP $3000 which I suggest taking to the trail head. You can walk an additional 10km on a gravel road to get to Hotel Las Torres (starting point for O), but I do not recommend it due to vehicles.
Where do I stay once inside the park?
You are not allowed to camp anywhere you want inside the park. You must stay at designated camp sites, and reservations are required.
What kind of accommodations are there?
Torres del Paine runs the full gamut of accommodations. You can camp with your own gear, you can have your camp set up for you prior to arrival (no lugging of tent), you can stay in the refugios (think hostel style dorms), private cabanas, or even a luxury hotel! Of course what is available depends on the particular campsite.
How do I book reservations?
There are three different entities that operate campsites within the park. They are:
- Fantastico Sur (operates Serón, Los Cuernos, El Chileno, Central, and Francés)
- Vertice (operates Dickson, Los Perros, Grey, and Paine Grande)
- CONAF (operates Paso, Italiano, and Torres)
Trying to string together accommodations is convoluted at best. The three systems are independent of each other, so there is a lot of switching back and forth between internet tabs. I would suggest making a spreadsheet of the tentative campsites and dates you would like to stay at them. Then prior to booking, go through each websites to make sure there is actually availability for the dates you have selected. Once you have measured twice, go through and actually book the campsites. Your plan is no good if you have 6 of the 7 campsites you need. It’s important to have all 7 campsites confirmed (assuming you are doing the O).
How much does it cost?
This is going to vary based on how you want to experience the park. Also, when you book is going to affect how much money you end up spending. I was penalized by not booking far enough in advance, and had to pay a hefty $90 USD to stay at a paid campsite, versus a free one. I was kicking myself big time on that one. I have never paid $90 USD to camp anywhere, ever.
The free campsites are, well, free. These are the ones operated by CONAF. To camp at the Fantastico Sur and Vertice campsites, there are nominal fees, but in the grand scheme of things it is quite affordable if you are lugging all of your gear in. Now, if you are planning to arrive to an already set up tent that you are not carrying, of course the cost is going to increase. Plan to stay in a refugio? Cost is going to increase. Want to stay in a private cabaña? Price is going to increase. I think you get my drift. Current prices are available on Fantastico Sur and Vertice’s websites.
Sample Itinerary for Hiking the “O” – 8 days, 7 nights
The below itinerary is only a suggestion. You definitely don’t have to camp at the same camp sites, or do it in the same number of days. From researching online and talking to folks while hiking, the below is a very common itinerary. If you are attempting the O, you do need to hike in a counter-clockwise direction. Doing a self-guided tour is entirely possible, but if you are looking for something a bit different, I suggest checking out what Erratic Rock has to offer. They are a great resource and have a physical location in Puerto Natales. Also, the hiking times listed below are only a reference. Depending on weather and your ability level, these times will vary.
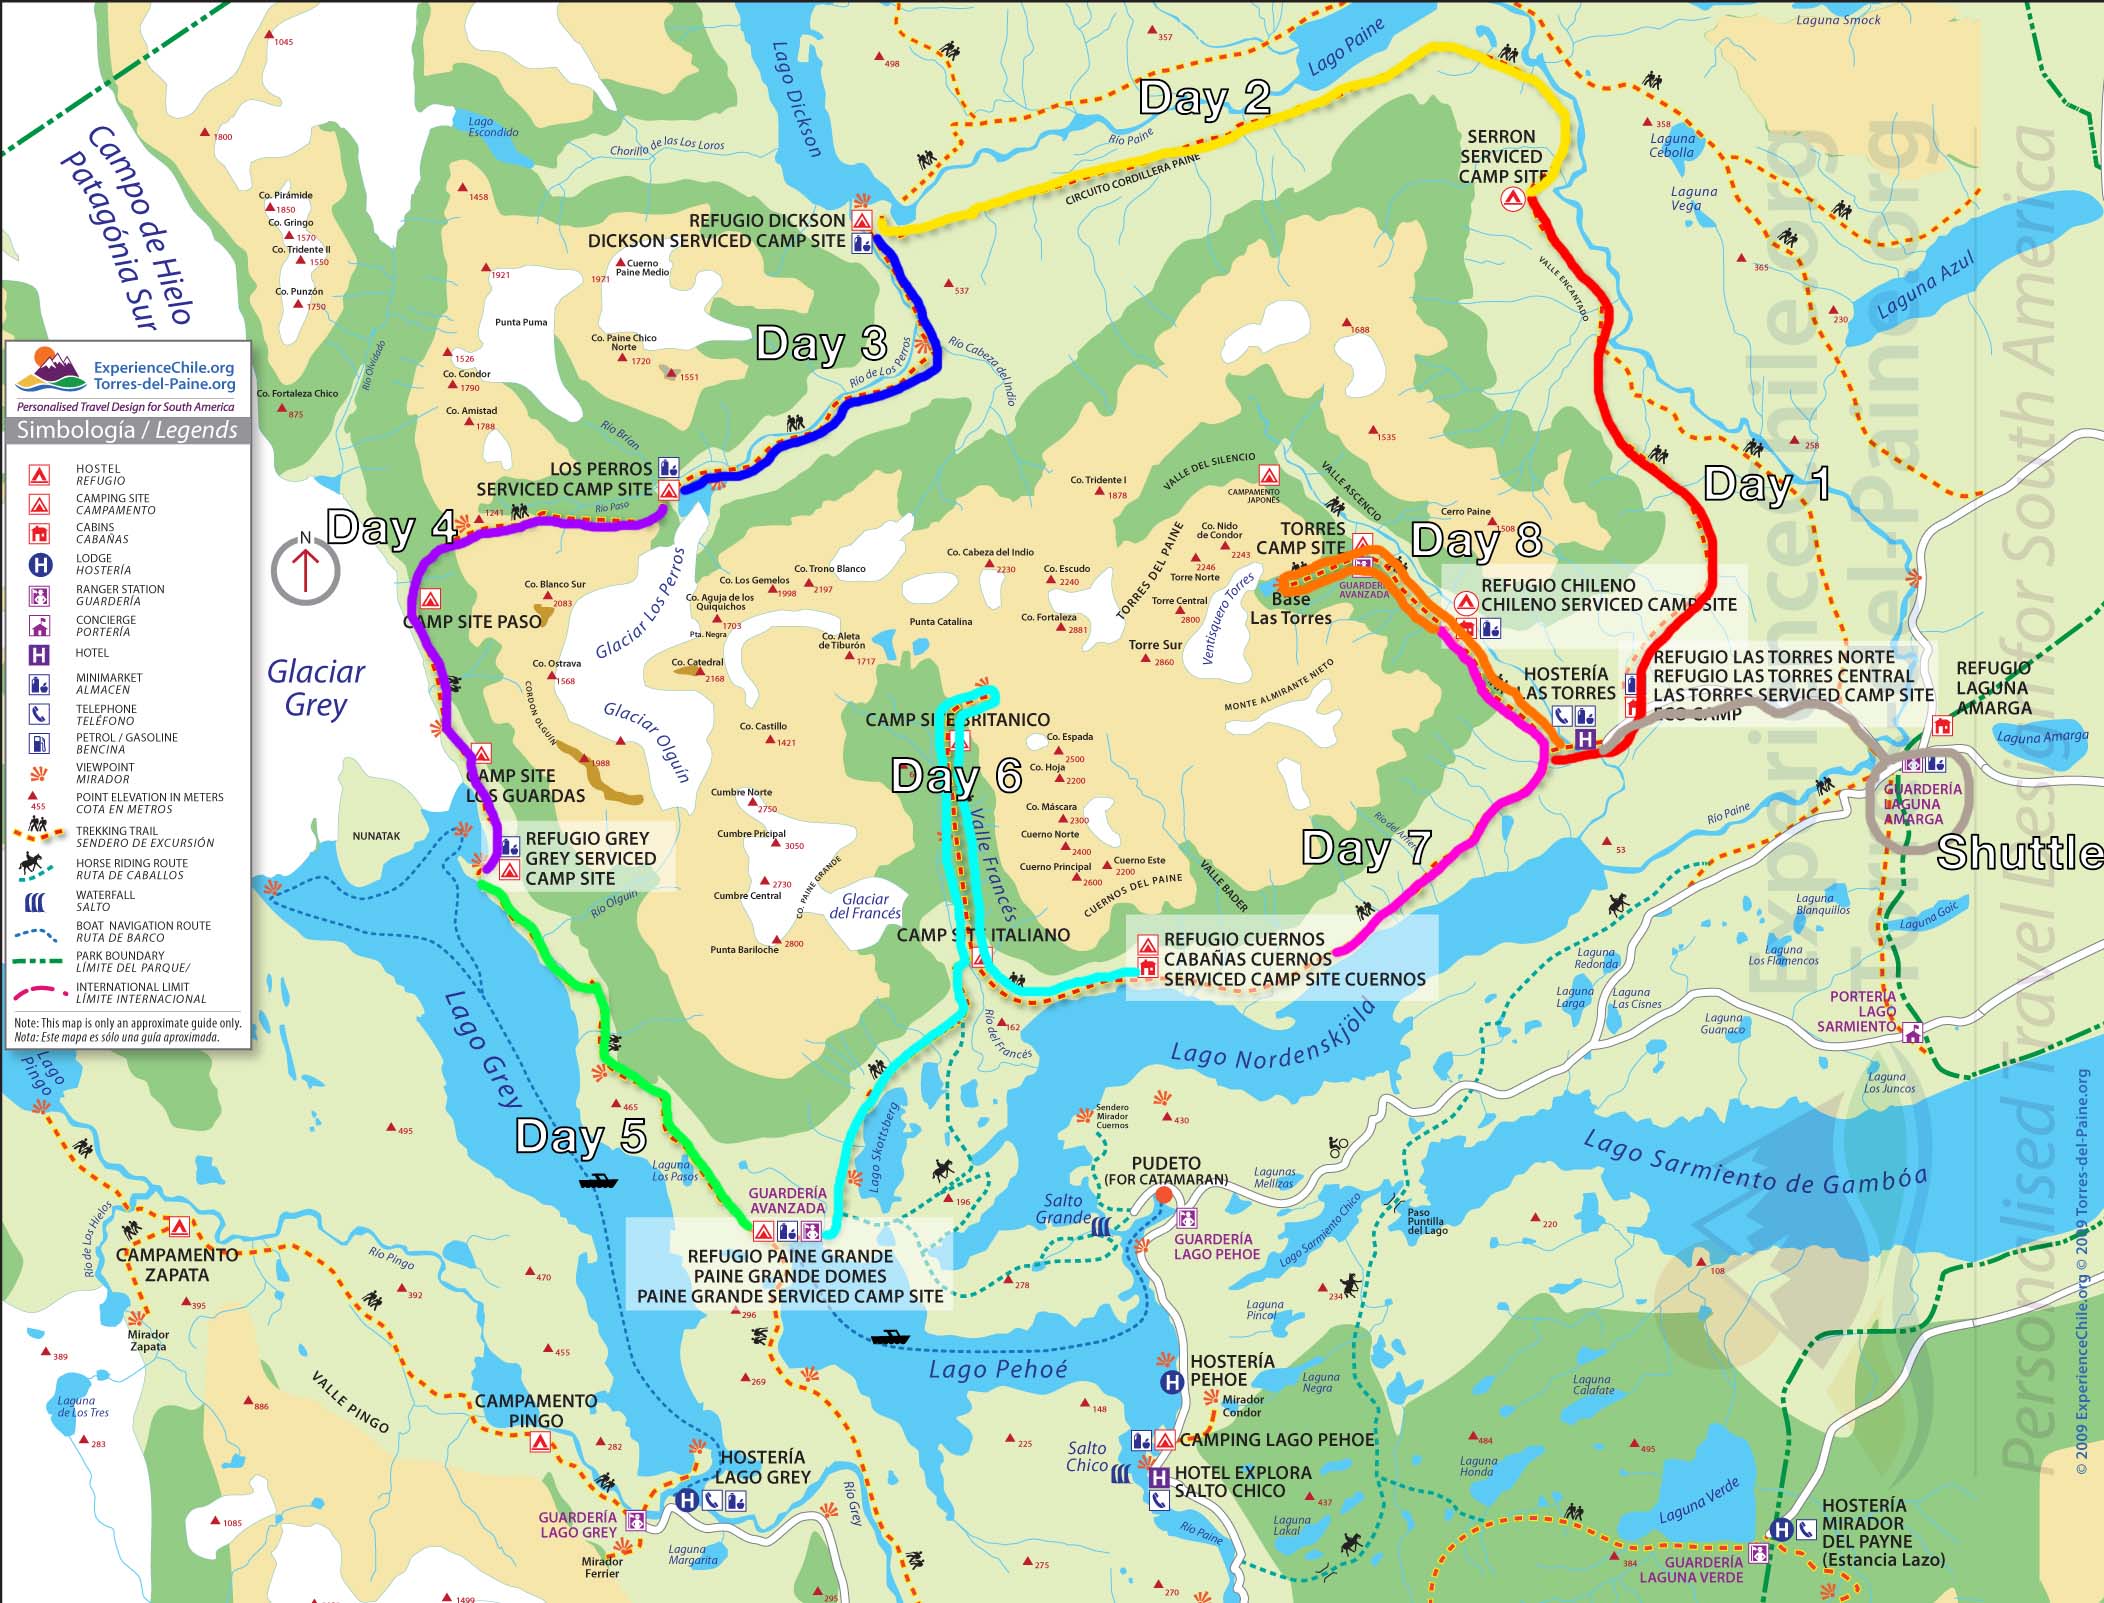
Day 1: Puerto Natales to Laguna Marga to Seron (13km, 4 hours)
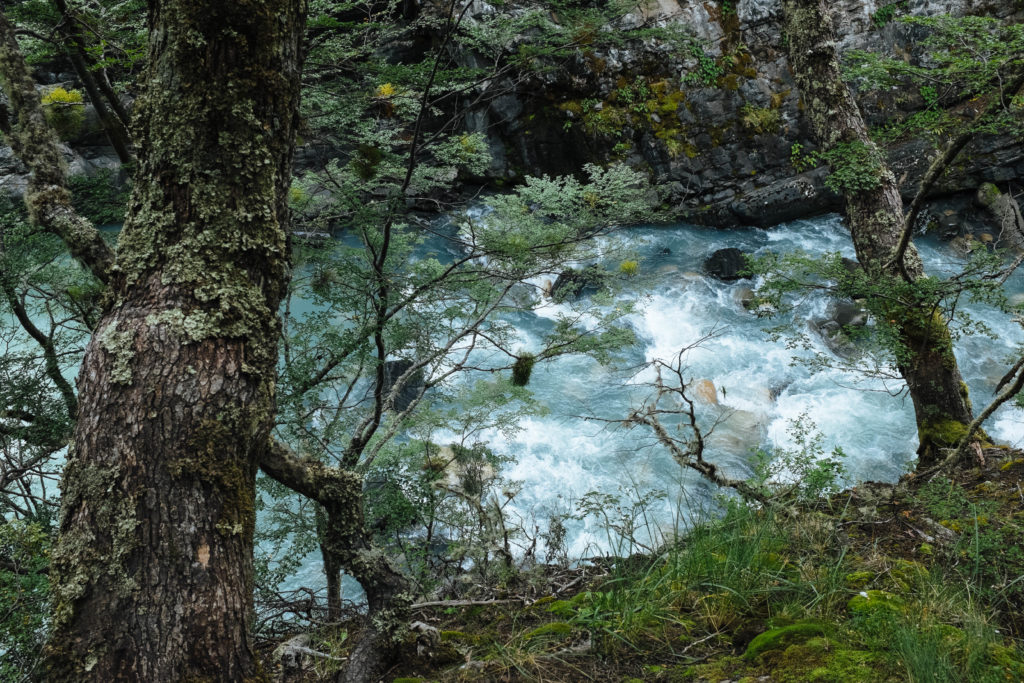
Start your day in town and take the early bus (approx 7:30am as of Feb 2017) to Laguna Marga. This is where you will disembark, check in, and prepare to start your trek. If hiking the O your first campground is going to be the Seron. You have a few options here. You can either take the shuttle to Hotel Torres (the starting point), walk the road to Hotel Torres (not suggested), or take a trail that is no longer listed on newer maps. I suggest taking the shuttle. I walked the road because I was trying to find the trail that is no longer listed on newer maps. I found it, but was hesitant to take it because it was no longer listed. I ended up trudging along on a very, very long gravel road with tons of traffic. Not exactly what I was hoping to experience right off the bat!
Day 2: Seron to Dickson (18km, 6 hours)
There was lots of chatter back in town if there were any points where reservations were actually being checked. This chatter mainly came from those who did not have reservations! The only “checkpoint” I saw along the duration of the O was between Seron and Dickson. There were two girls who did not have all required reservations I met on Day 1 who were no longer present after this checkpoint. With other campsites you’ll be checking in with CONAF and the site operator, but this was the only checkpoint I saw along the way.
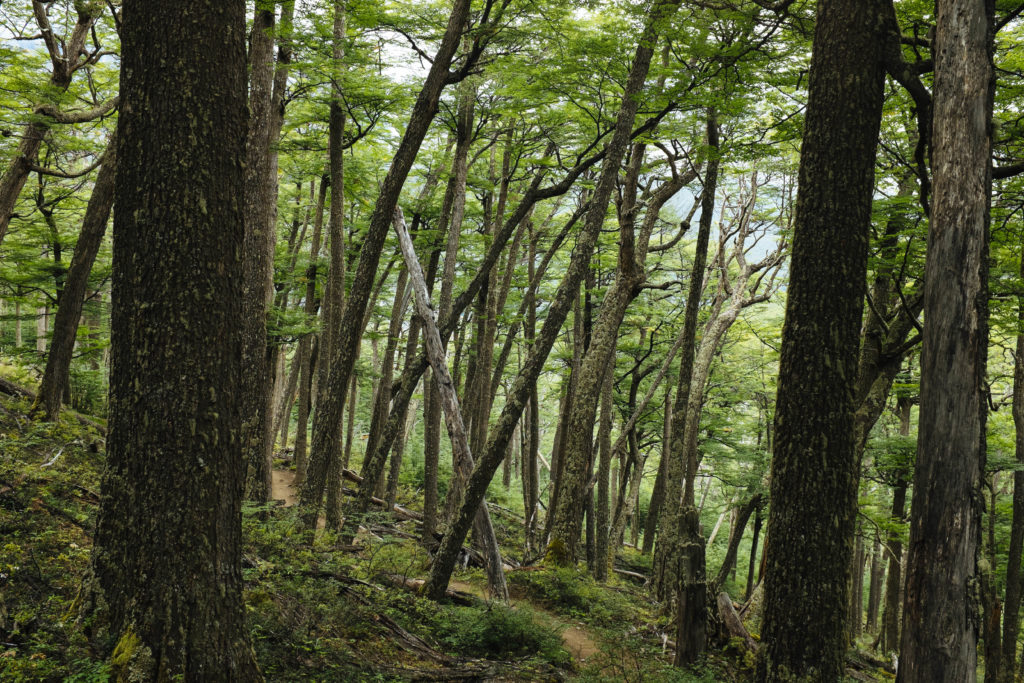
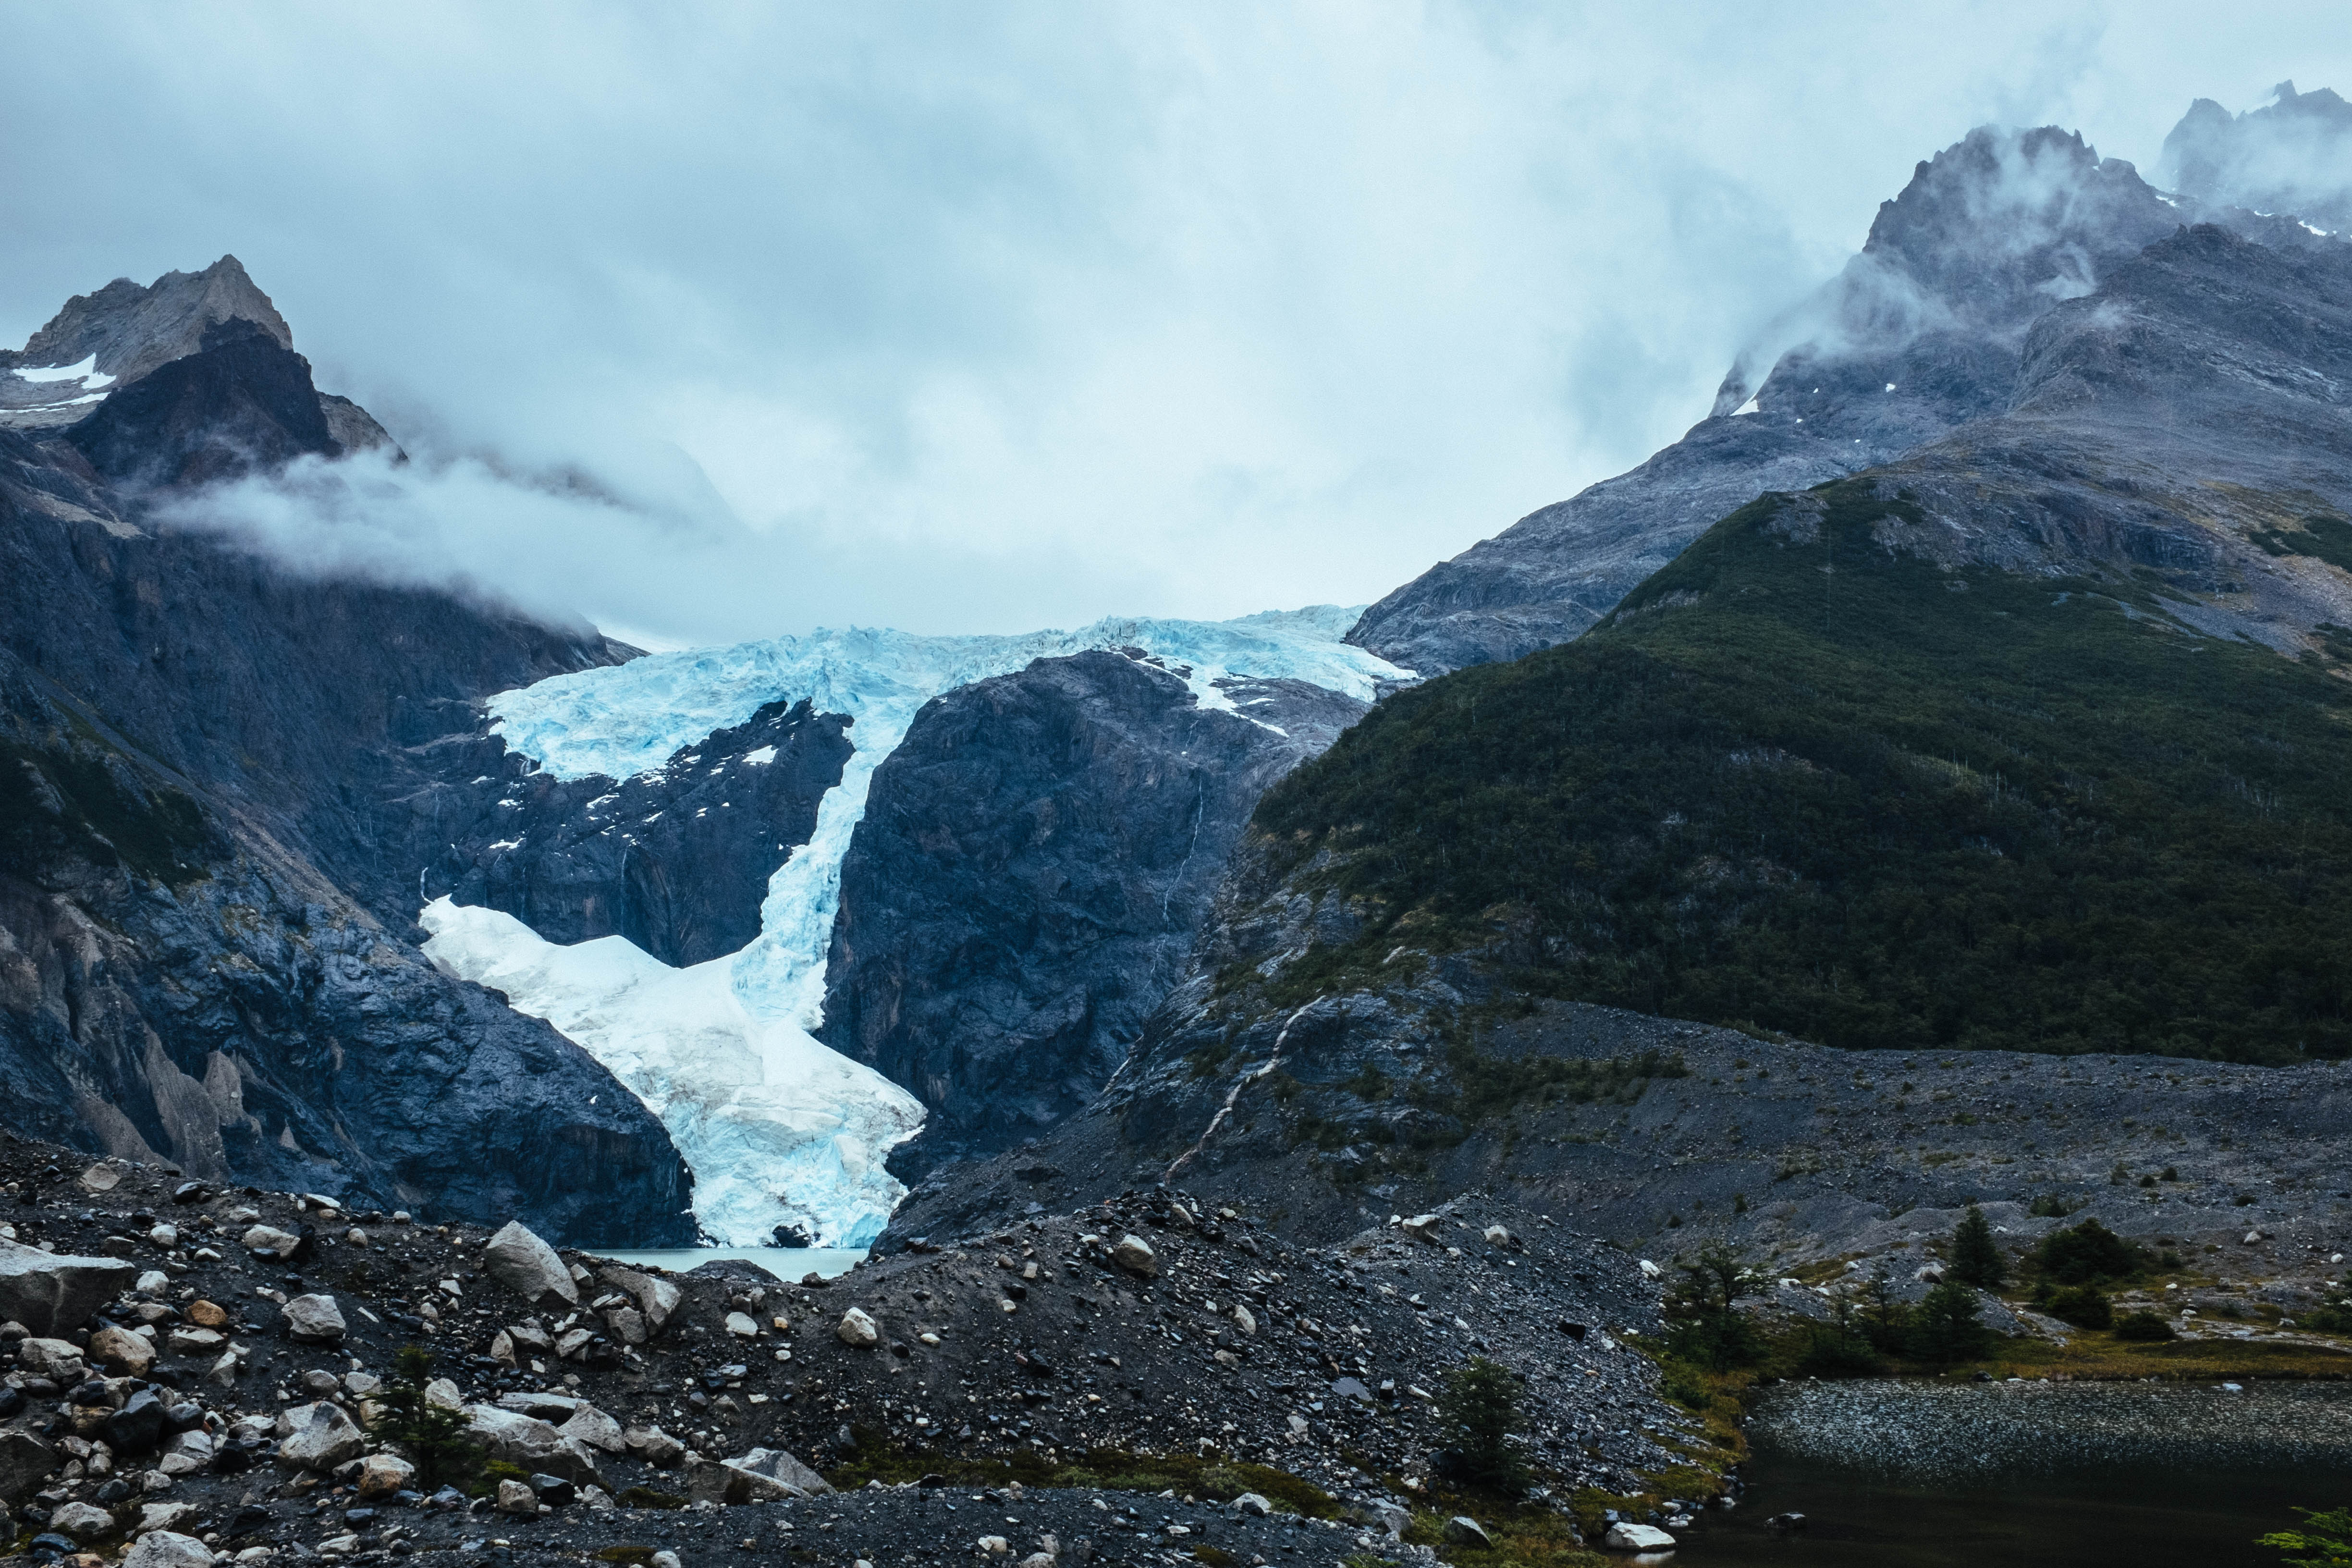
Day 3: Dickson to Los Perros (12km, 4.5 hours)
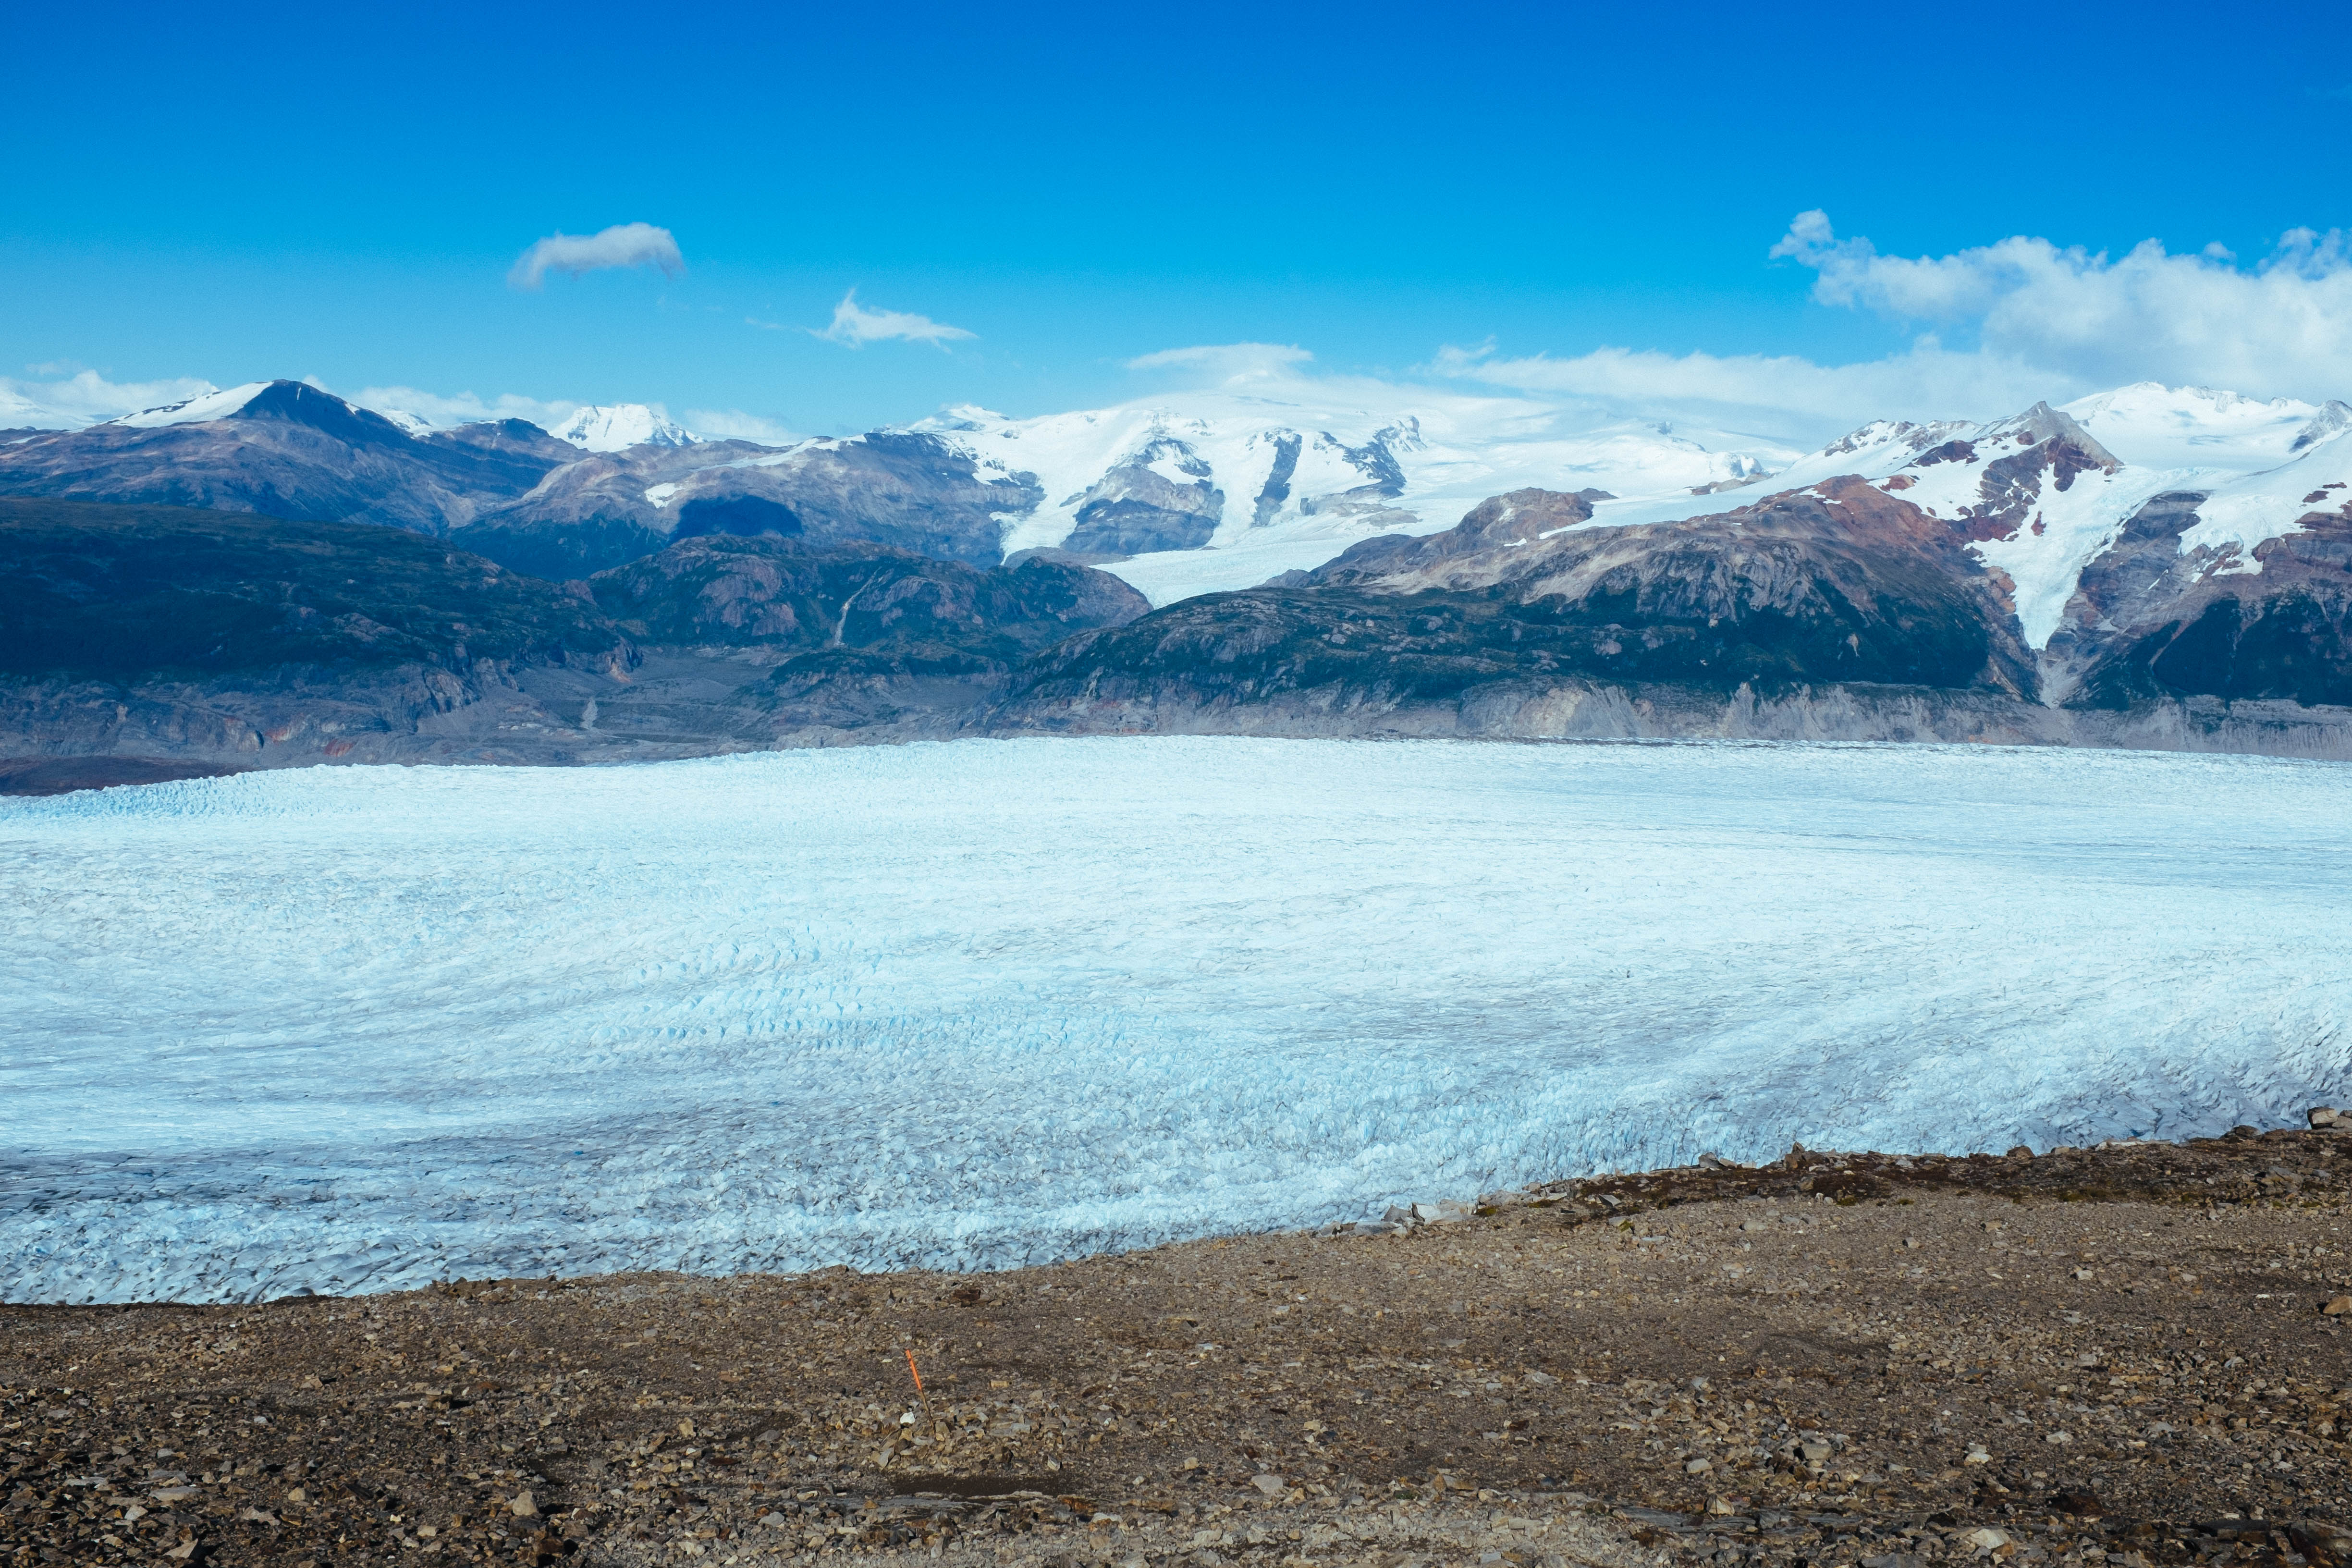
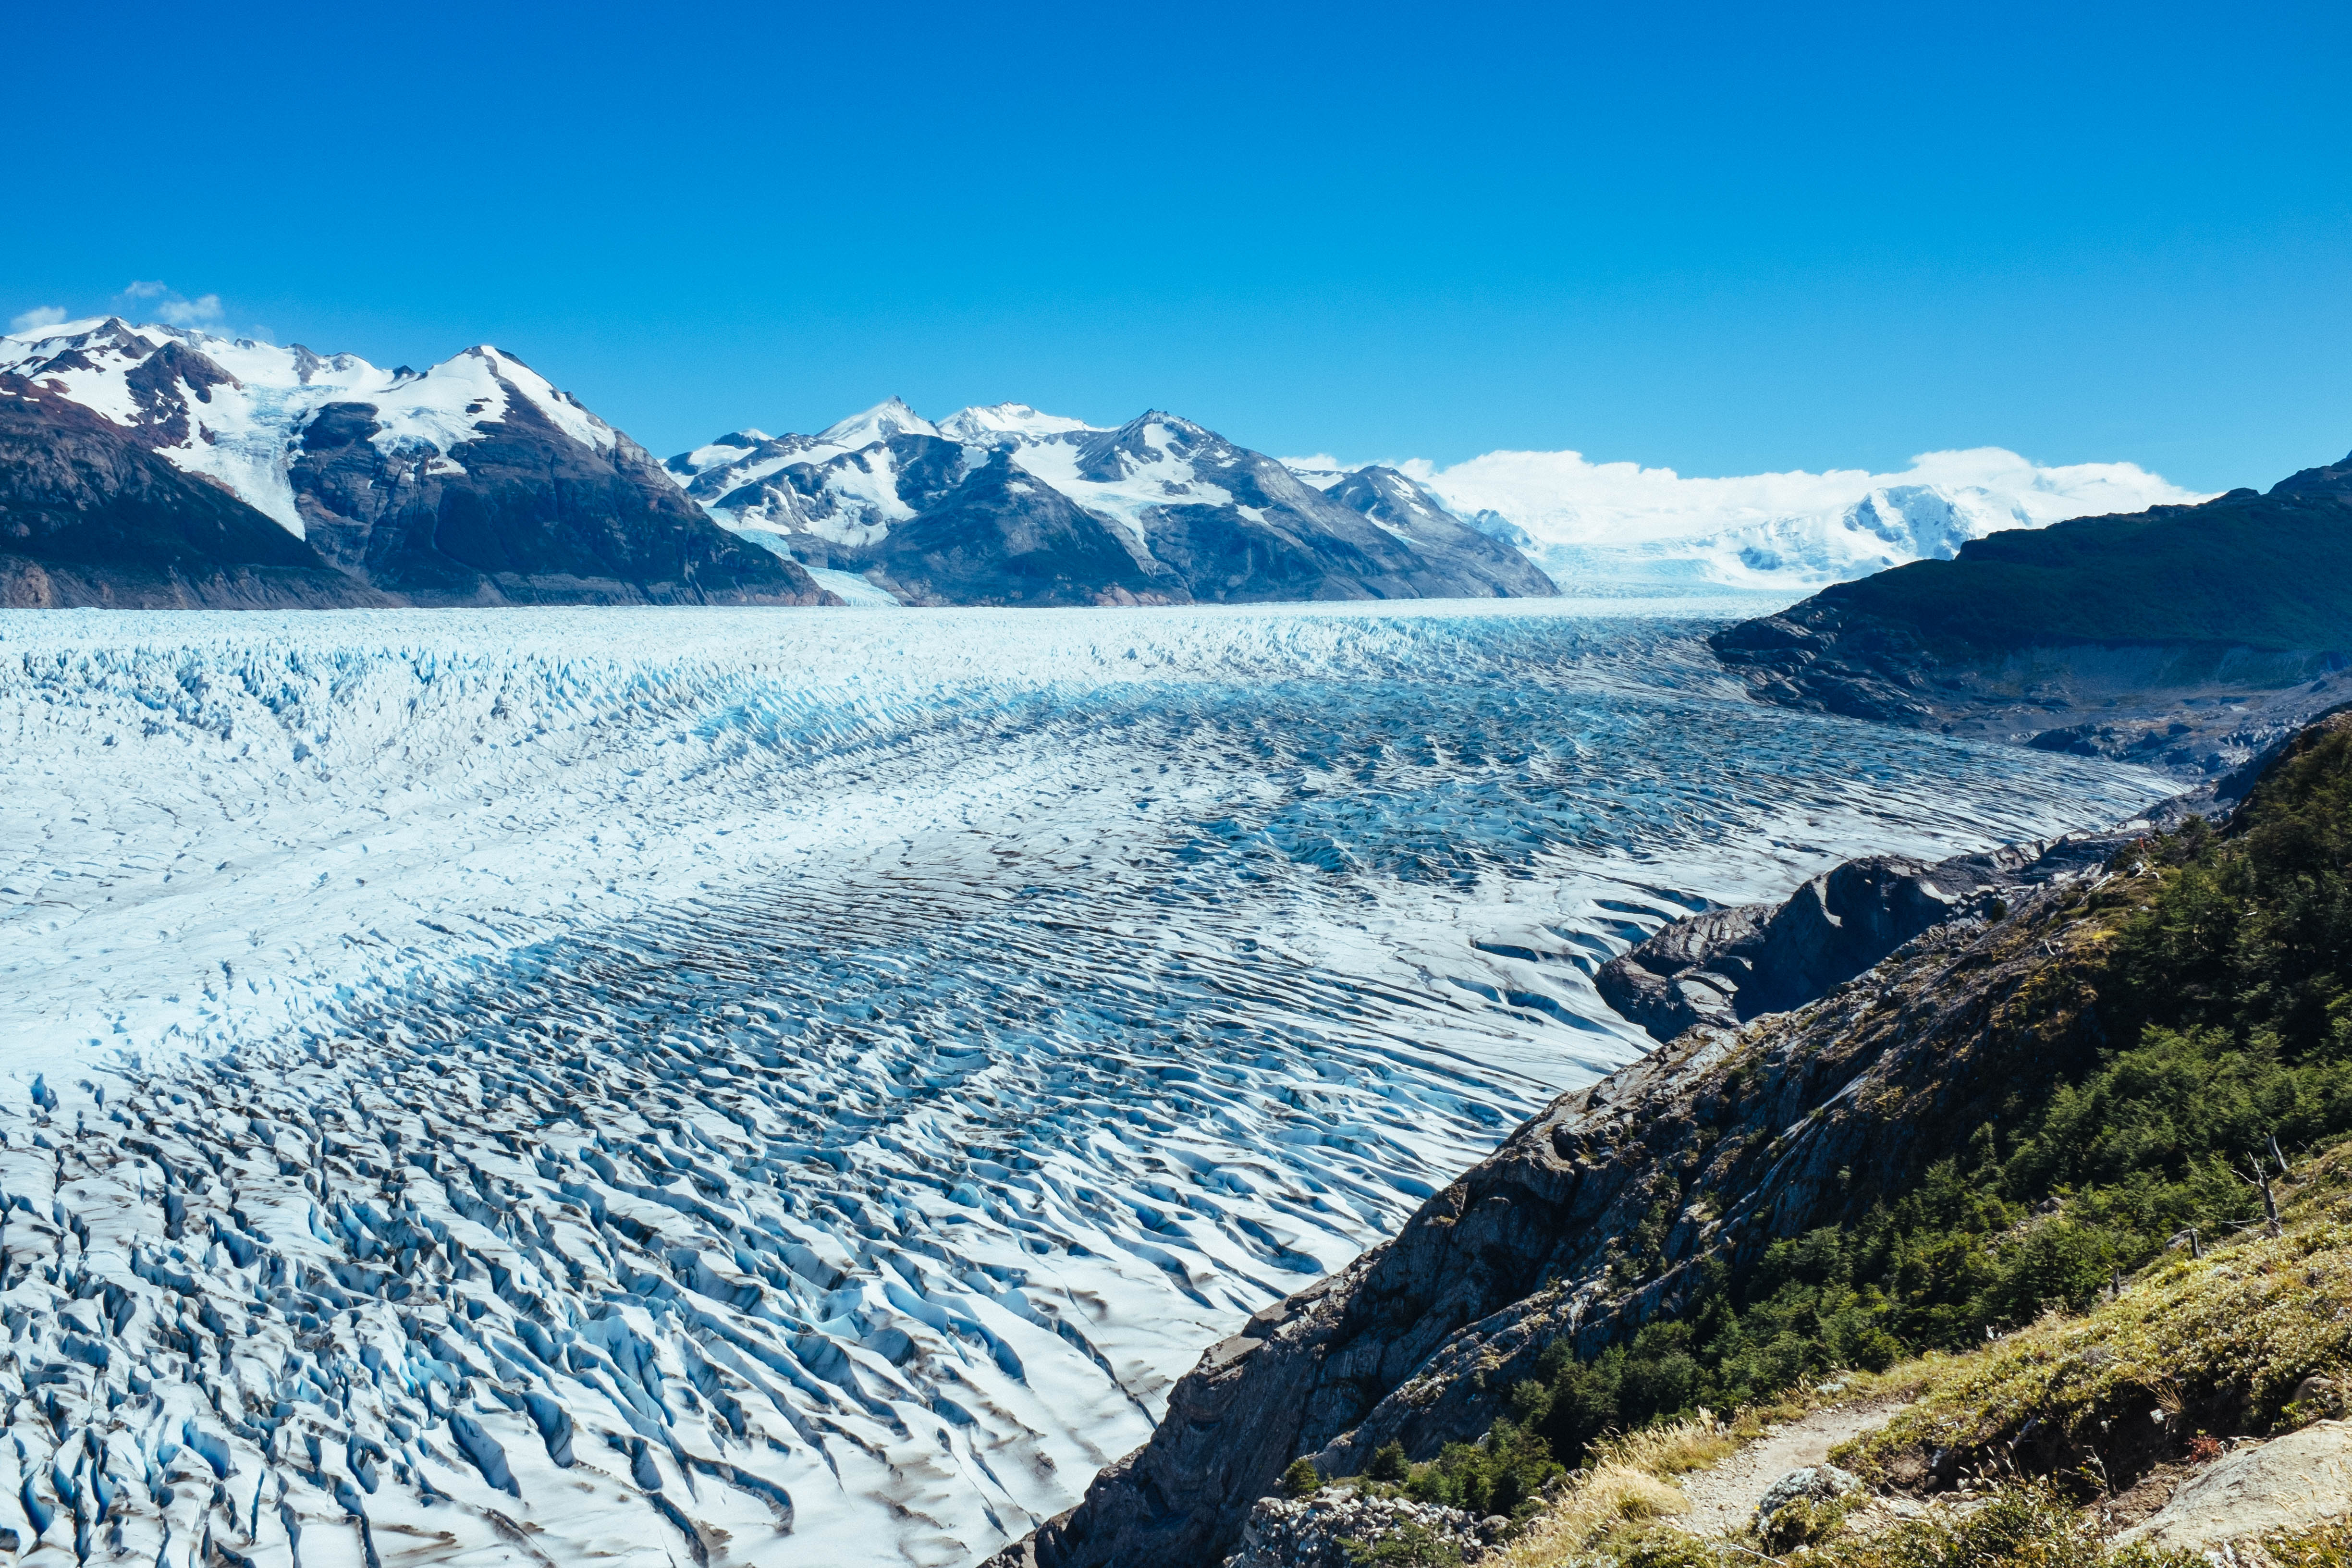
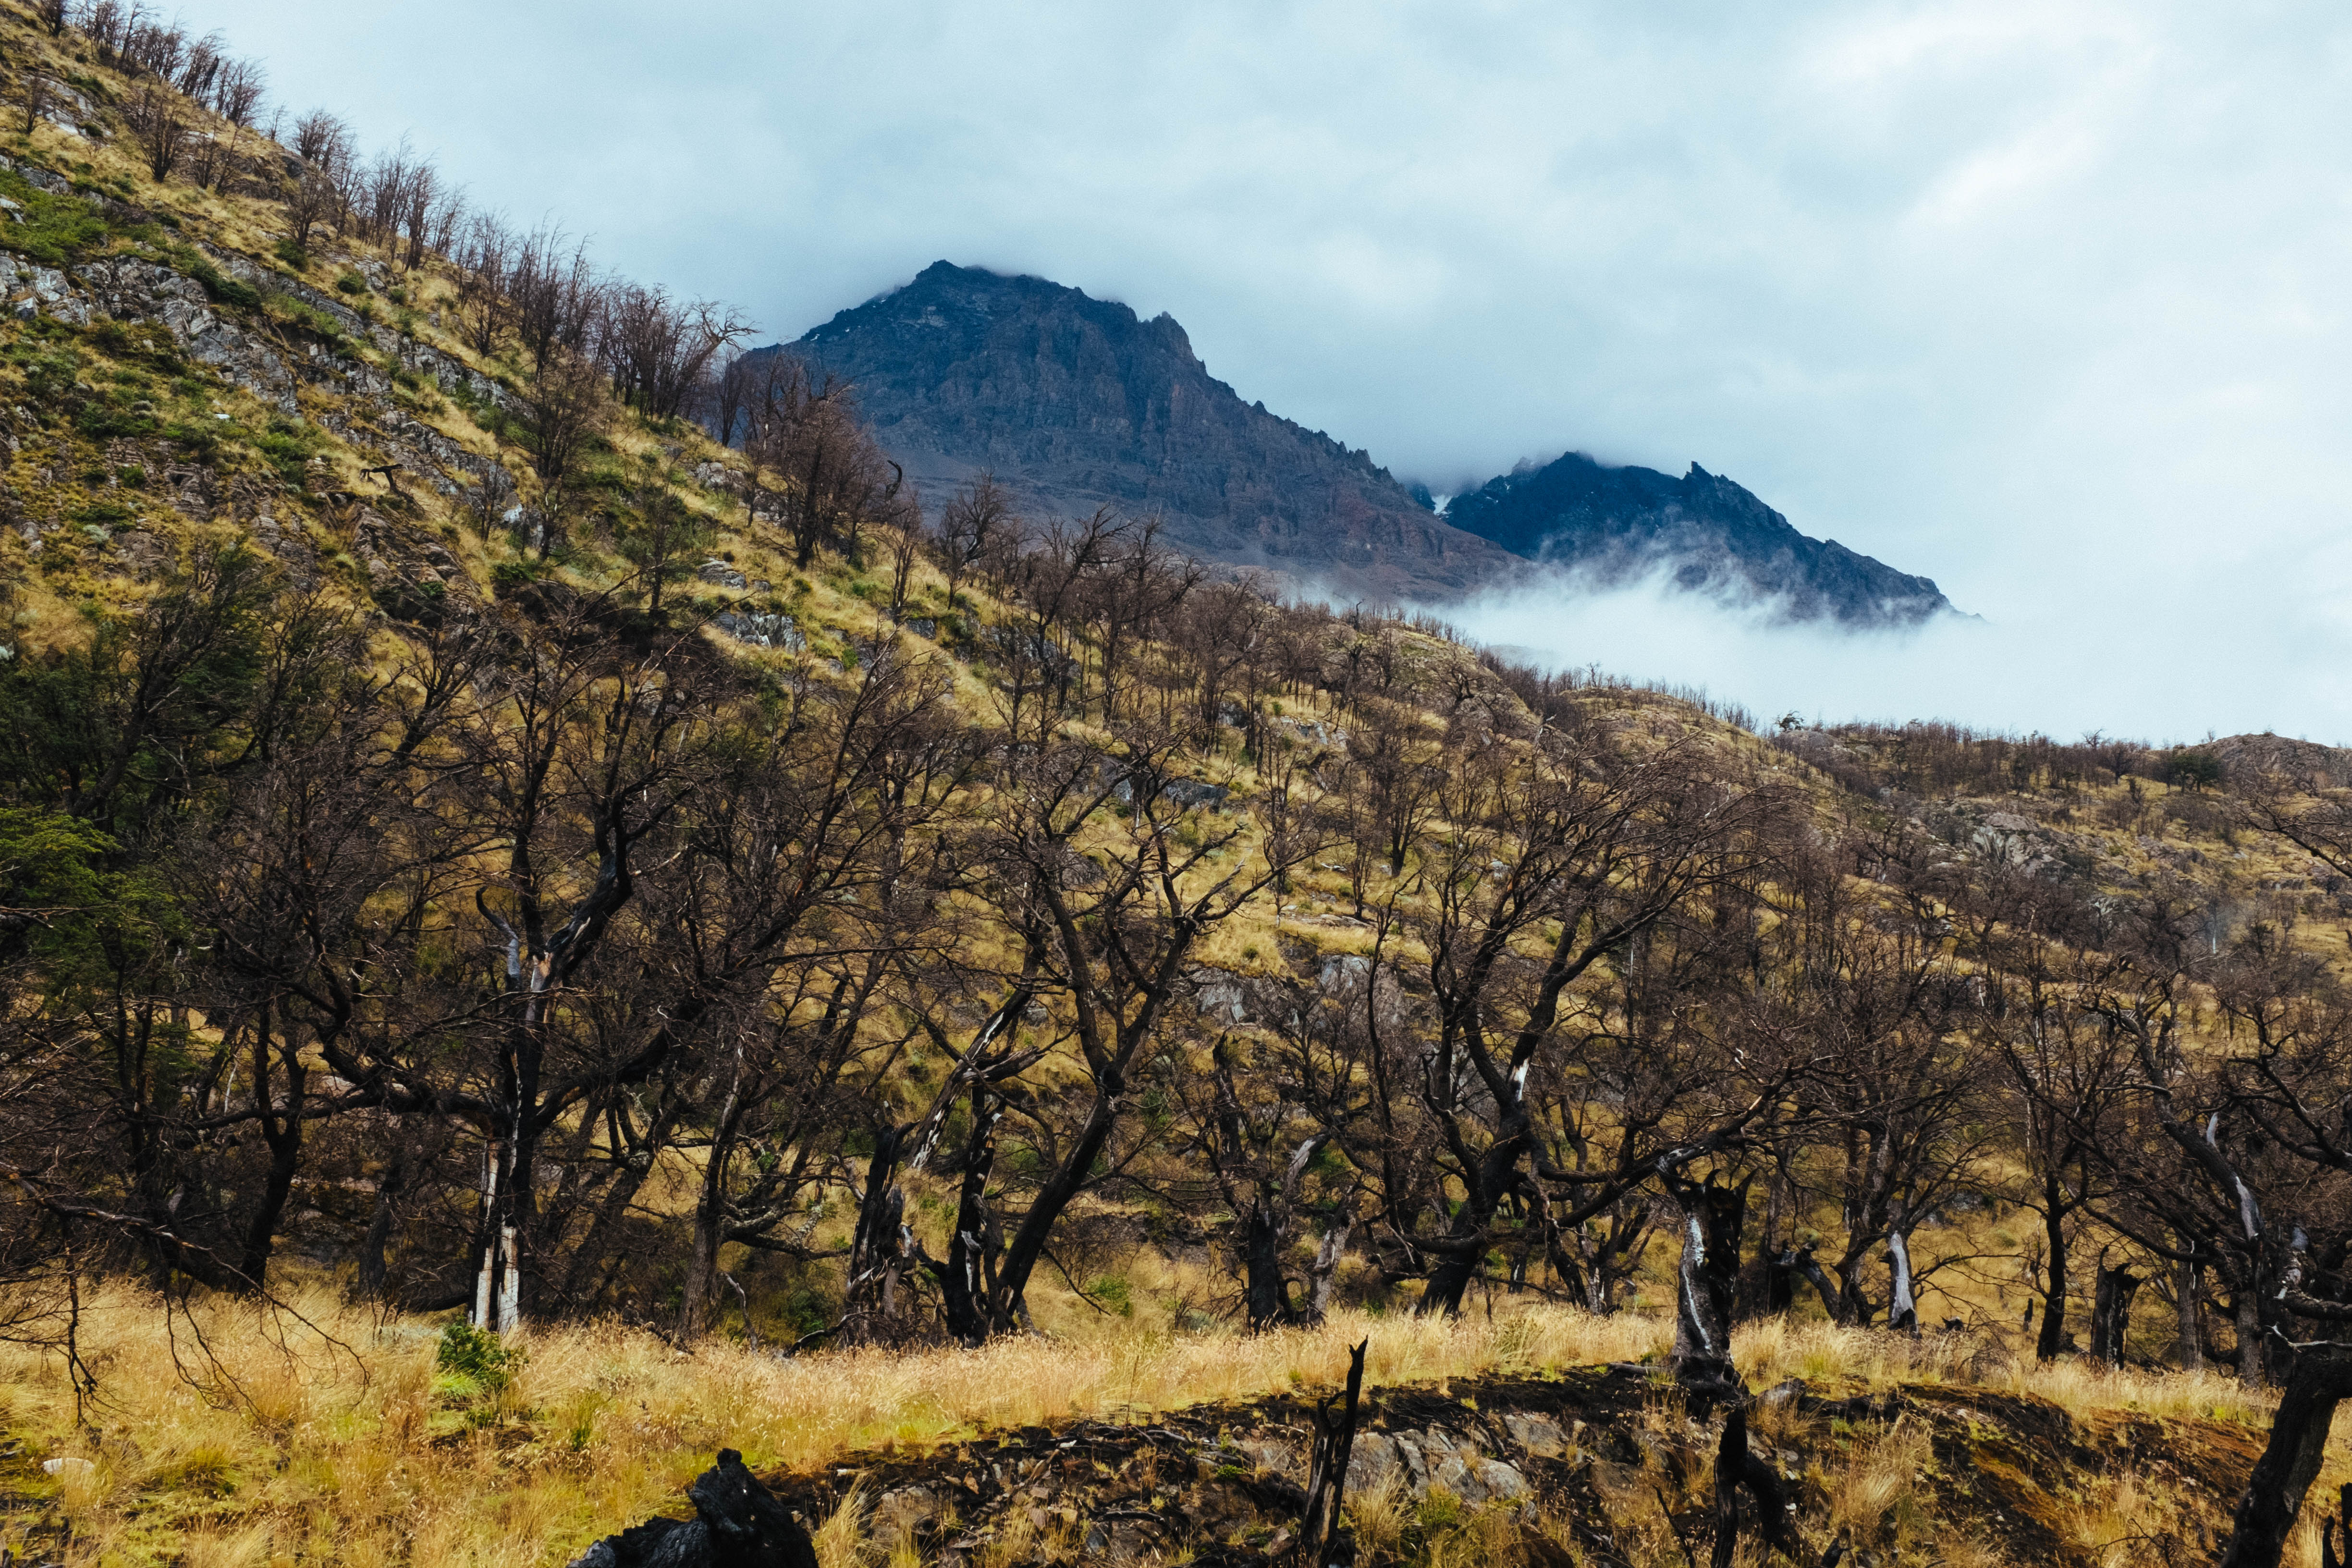
I will never forget coming up out of the forest and catching my first glimpse of Glacier Los Perros, quivering in the distance. It was the first time that I had ever seen a glacier, and it’s a day that I will always remember. There is no way to properly convey the enormity of this frozen, hulking behemoth. Standing in front of it was not only visually striking, but hearing the lurching growls of the sleeping ice giant send chills down my spine to this very day.
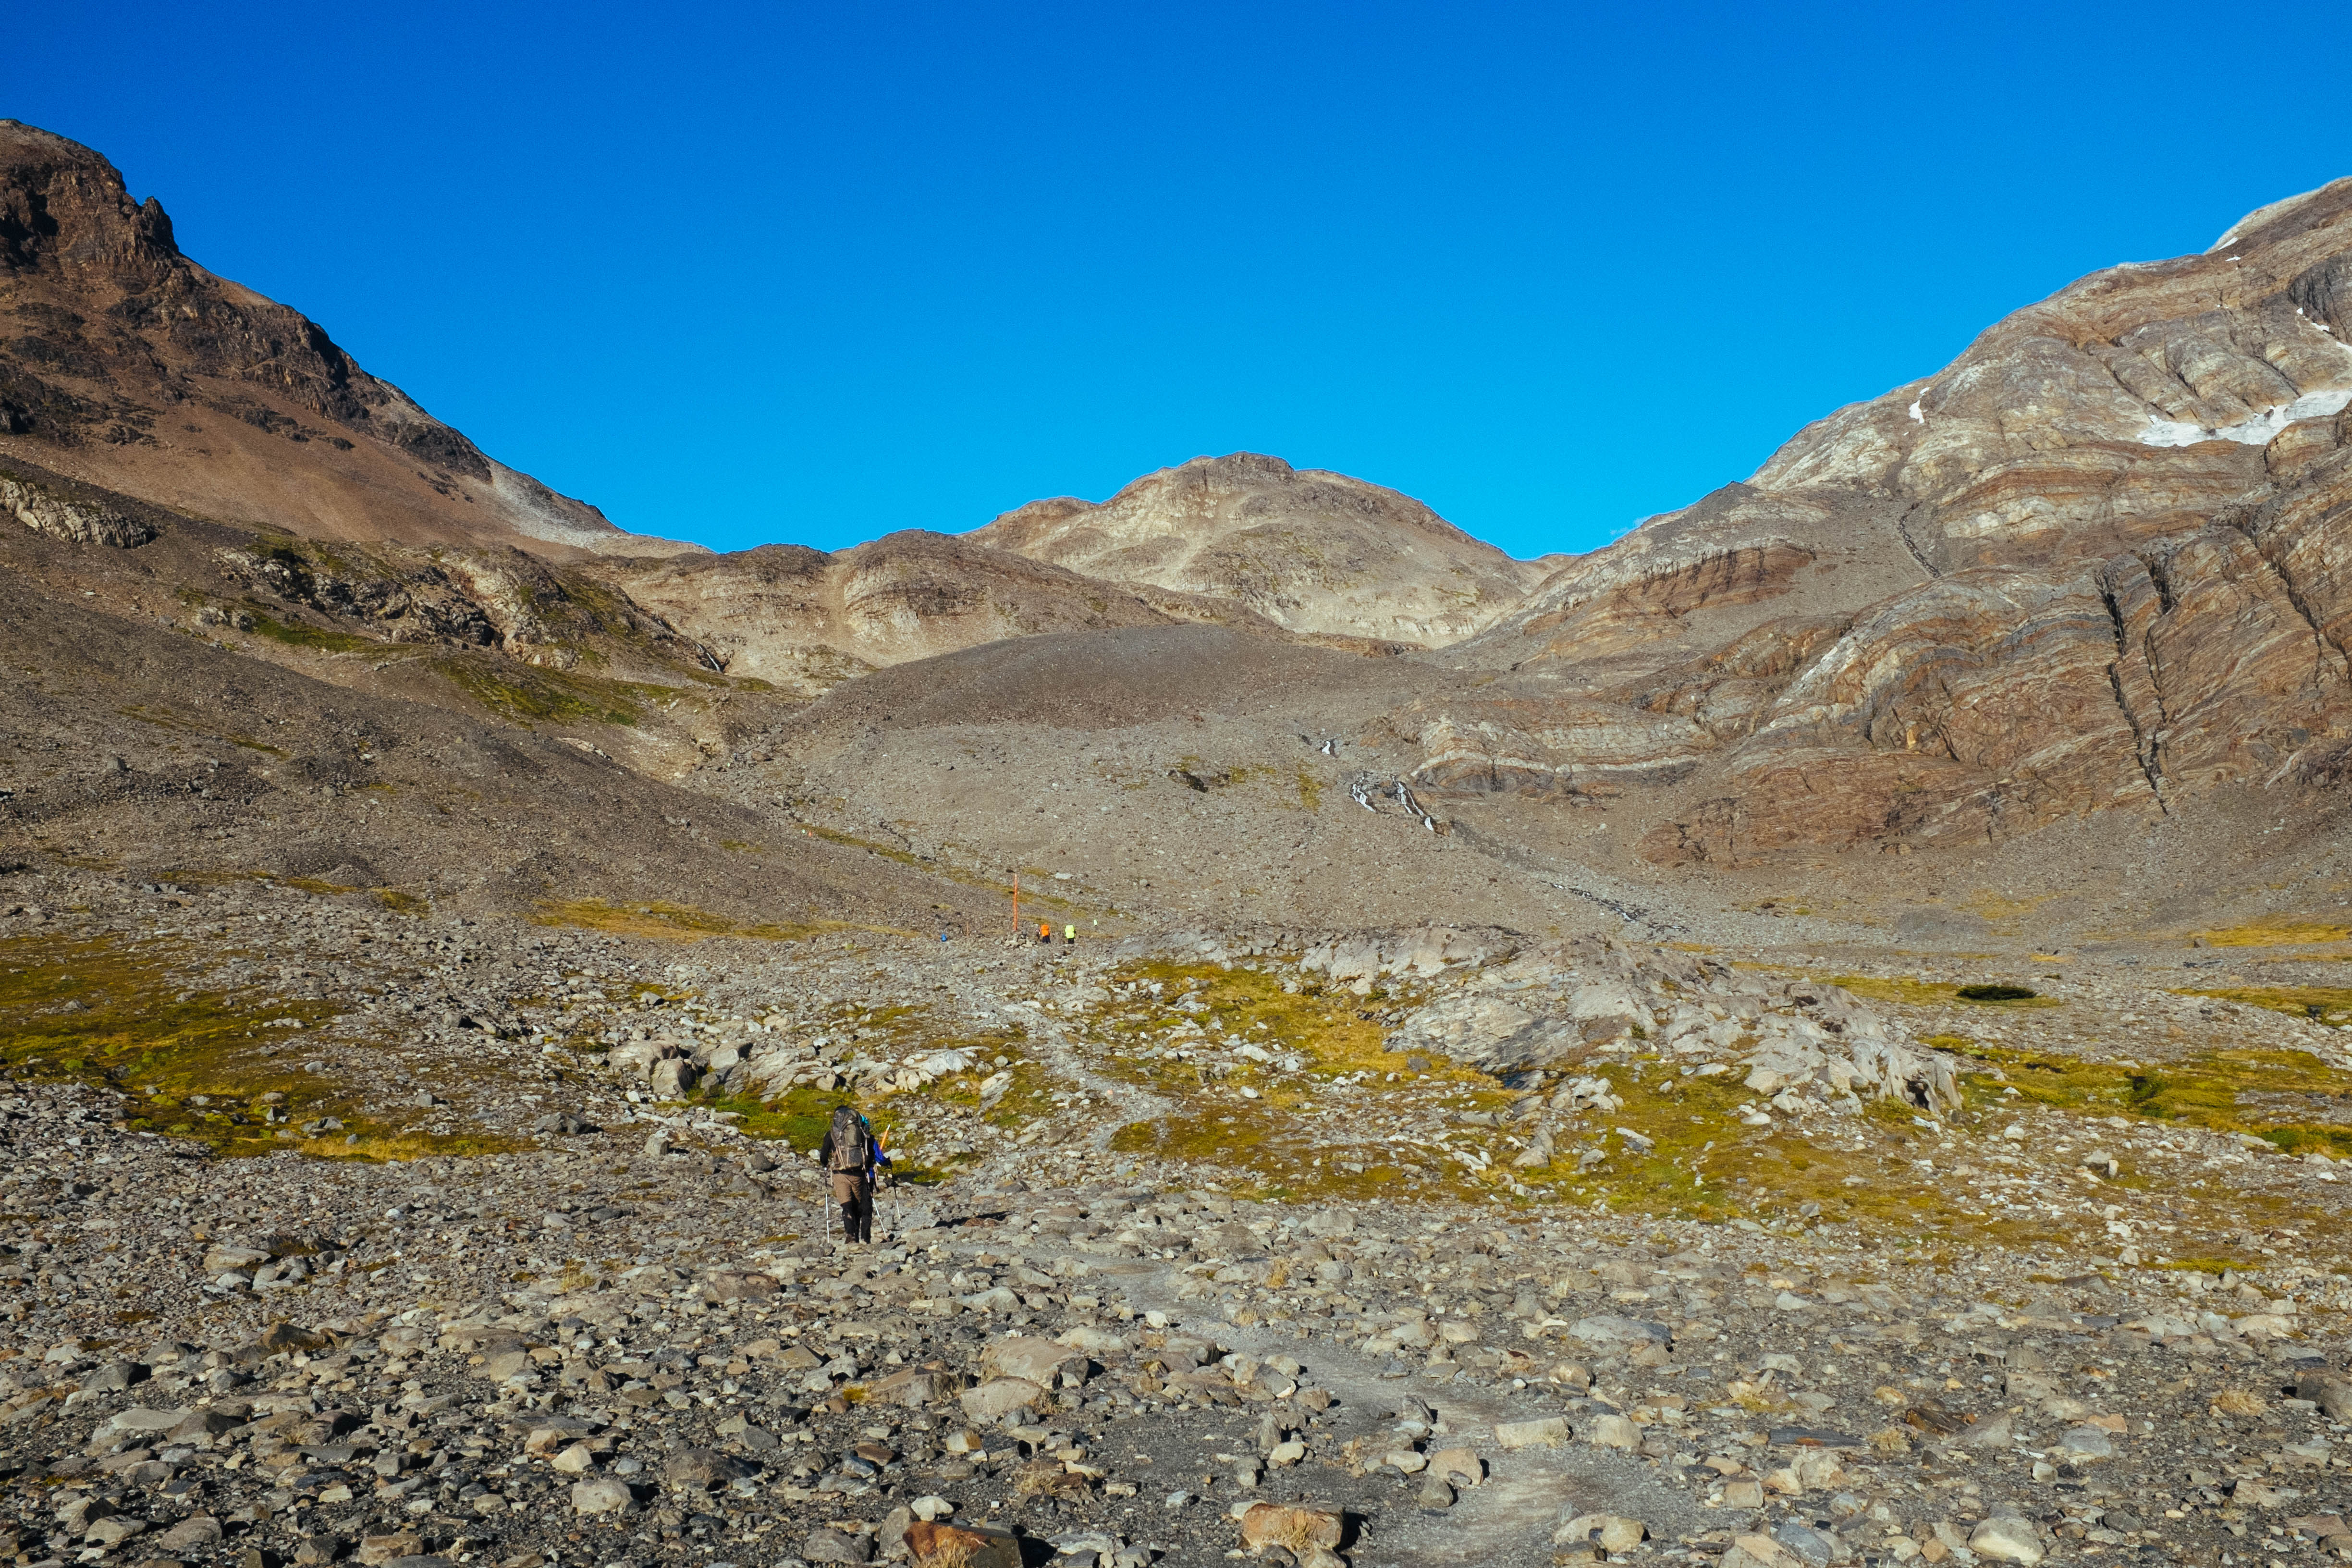
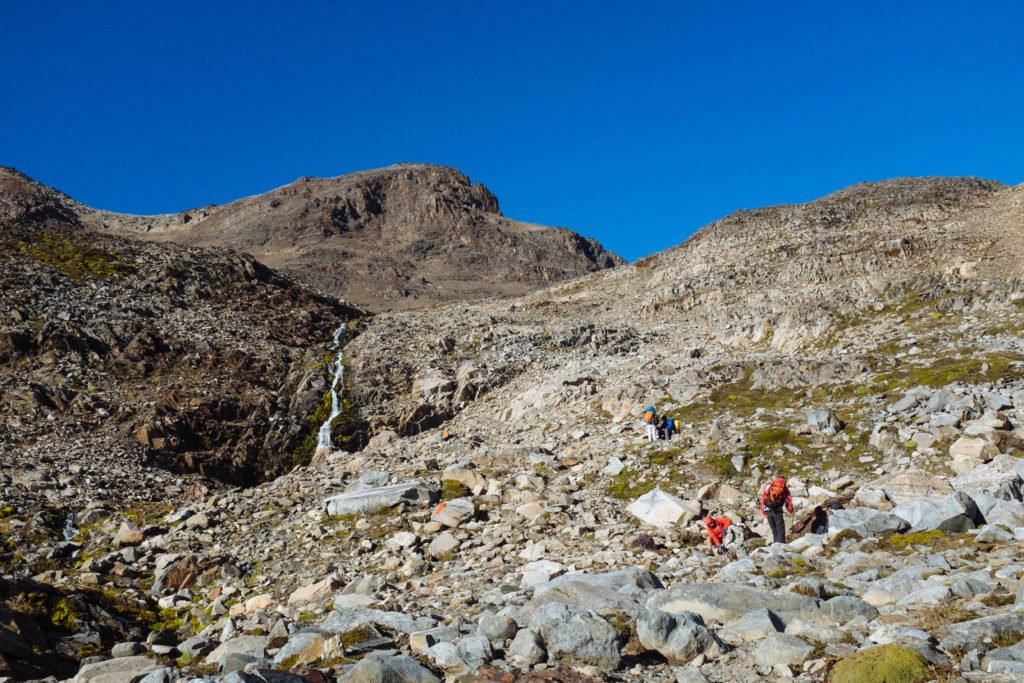
Day 4: Los Perros to Grey (15km, 11 hours)
I remember the night leading into hiking up the John Gardner Pass being a particularly wet one. It made for a very muddy start the following morning. I definitely lost my balance a few times in the mud, but never went full on kasploosh into the muck. I wish somewhere there was a compilation video of the quiet, unbalanced struggles of those hiking alone; arms wildly waving, hiking poles stabbing into thin air, hiking boots gloop-glooping as forest creatures looks on in embarrassment, shaking their heads in disbelief.
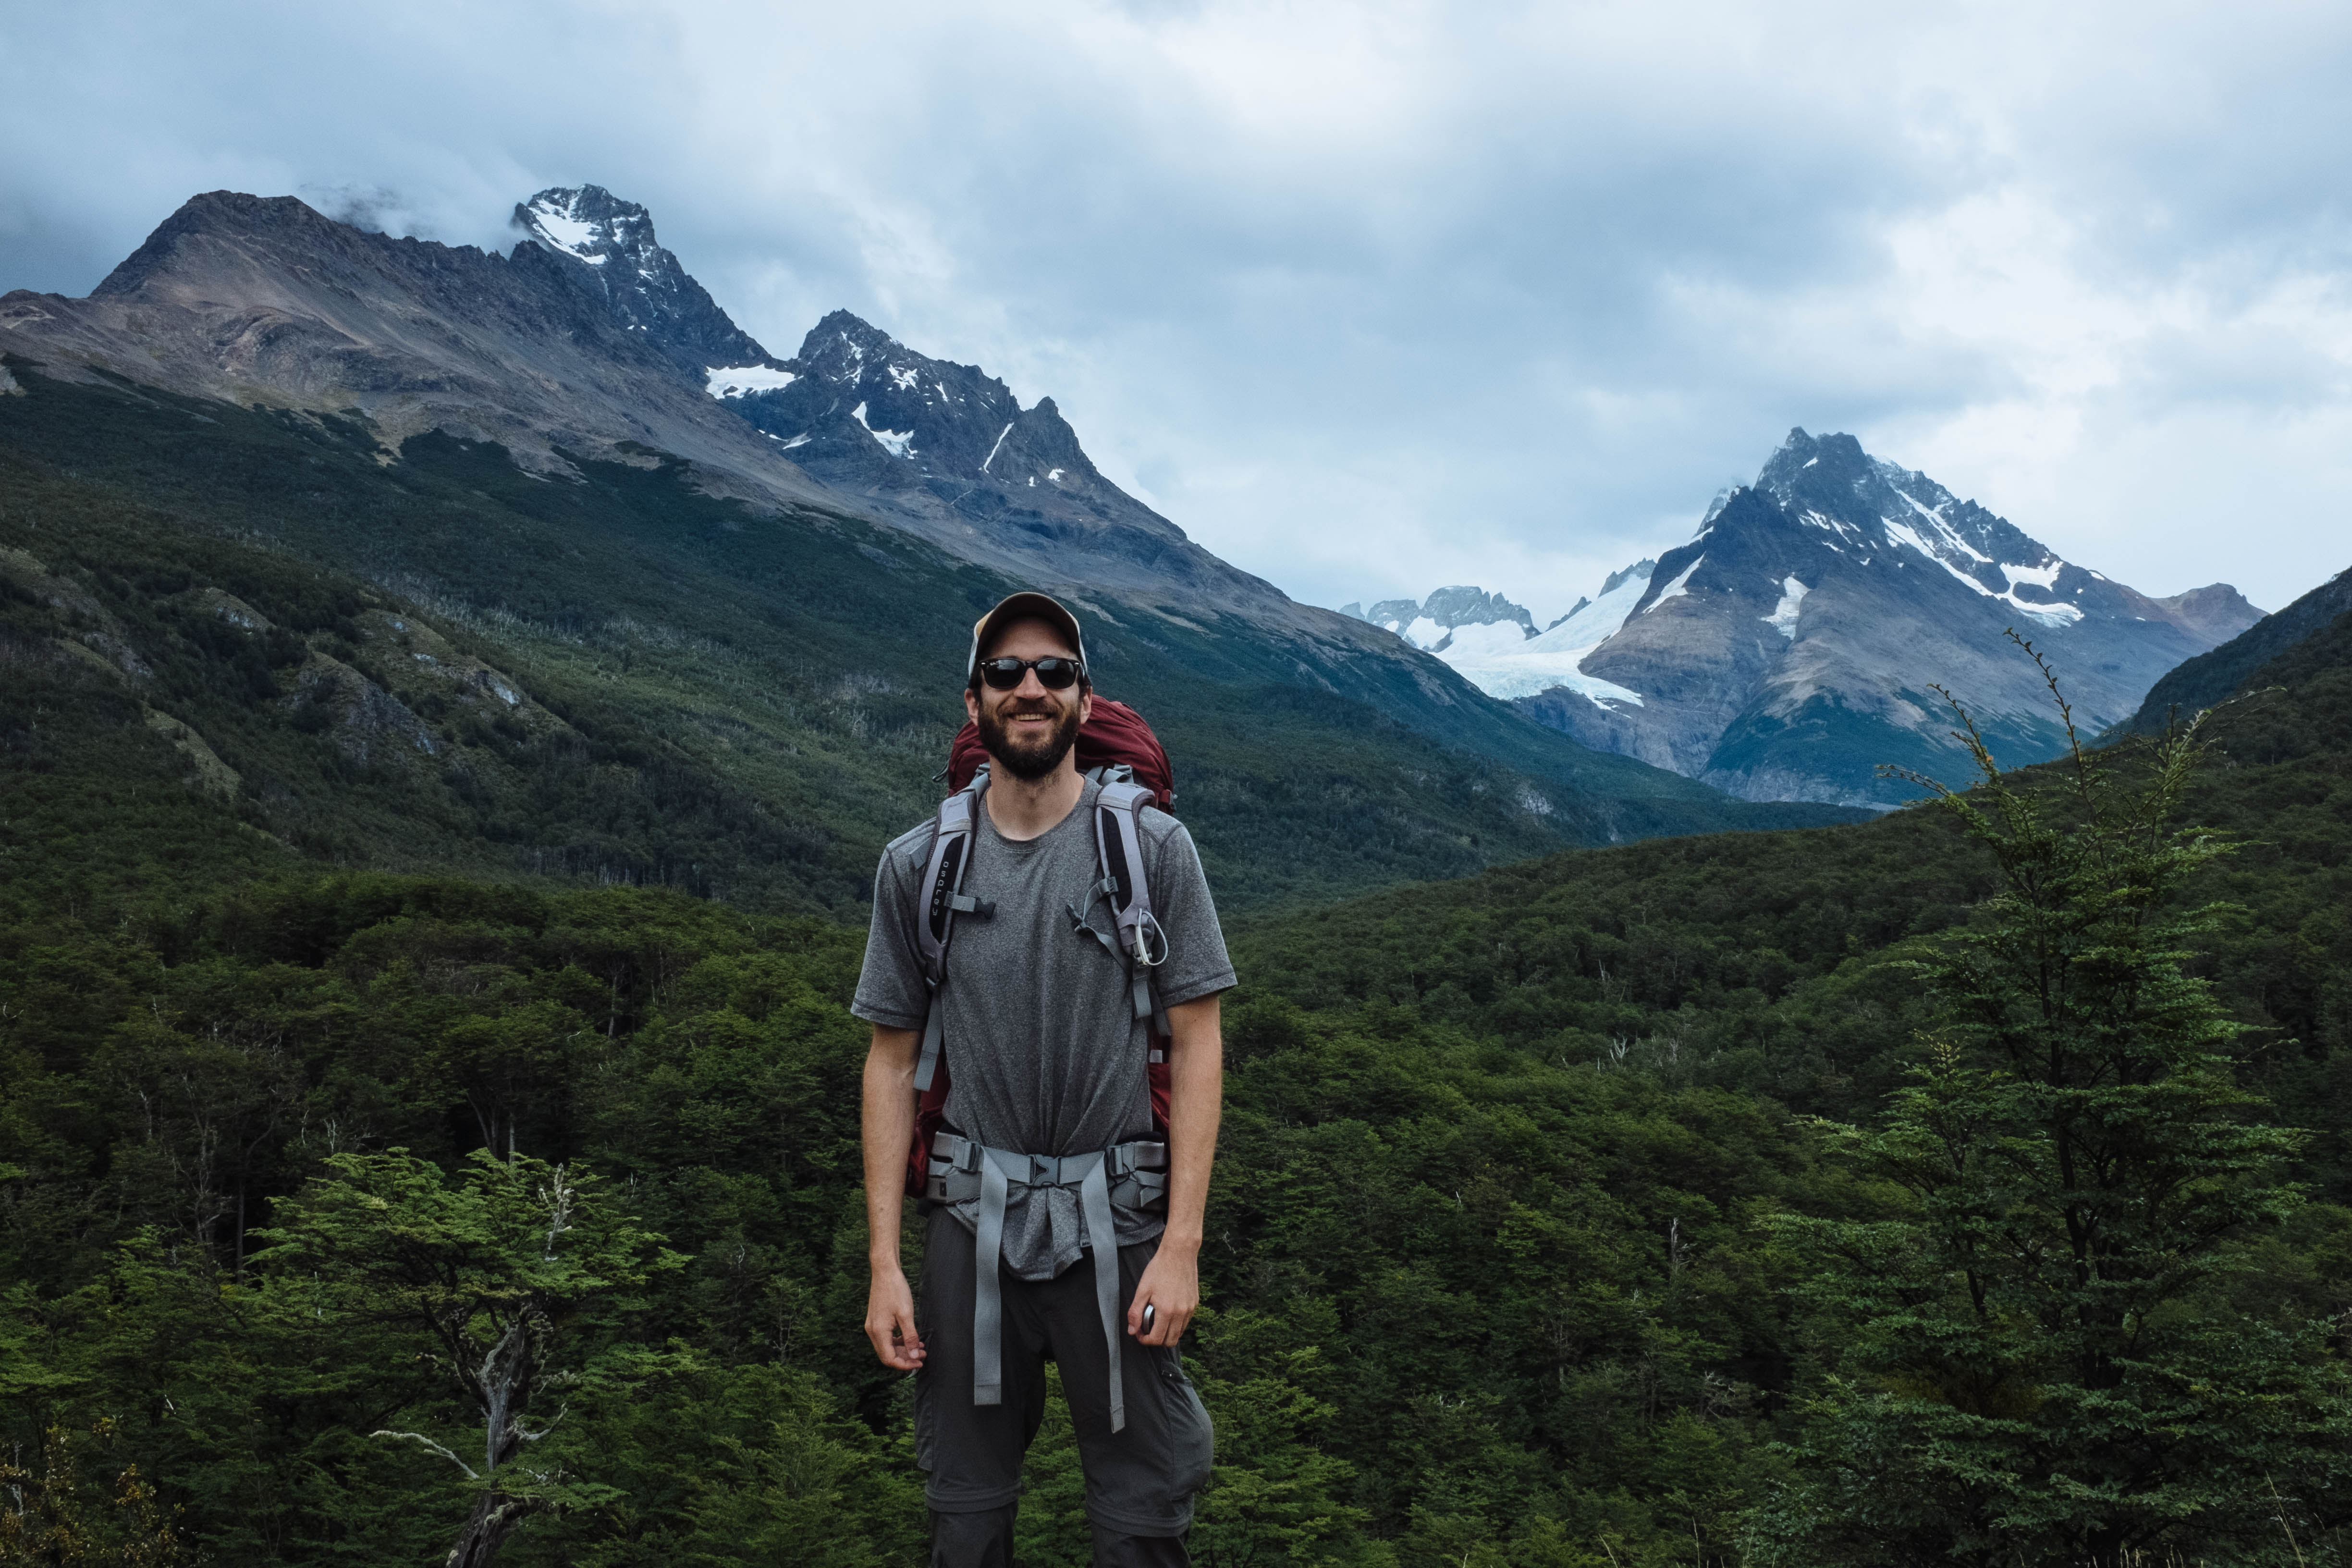
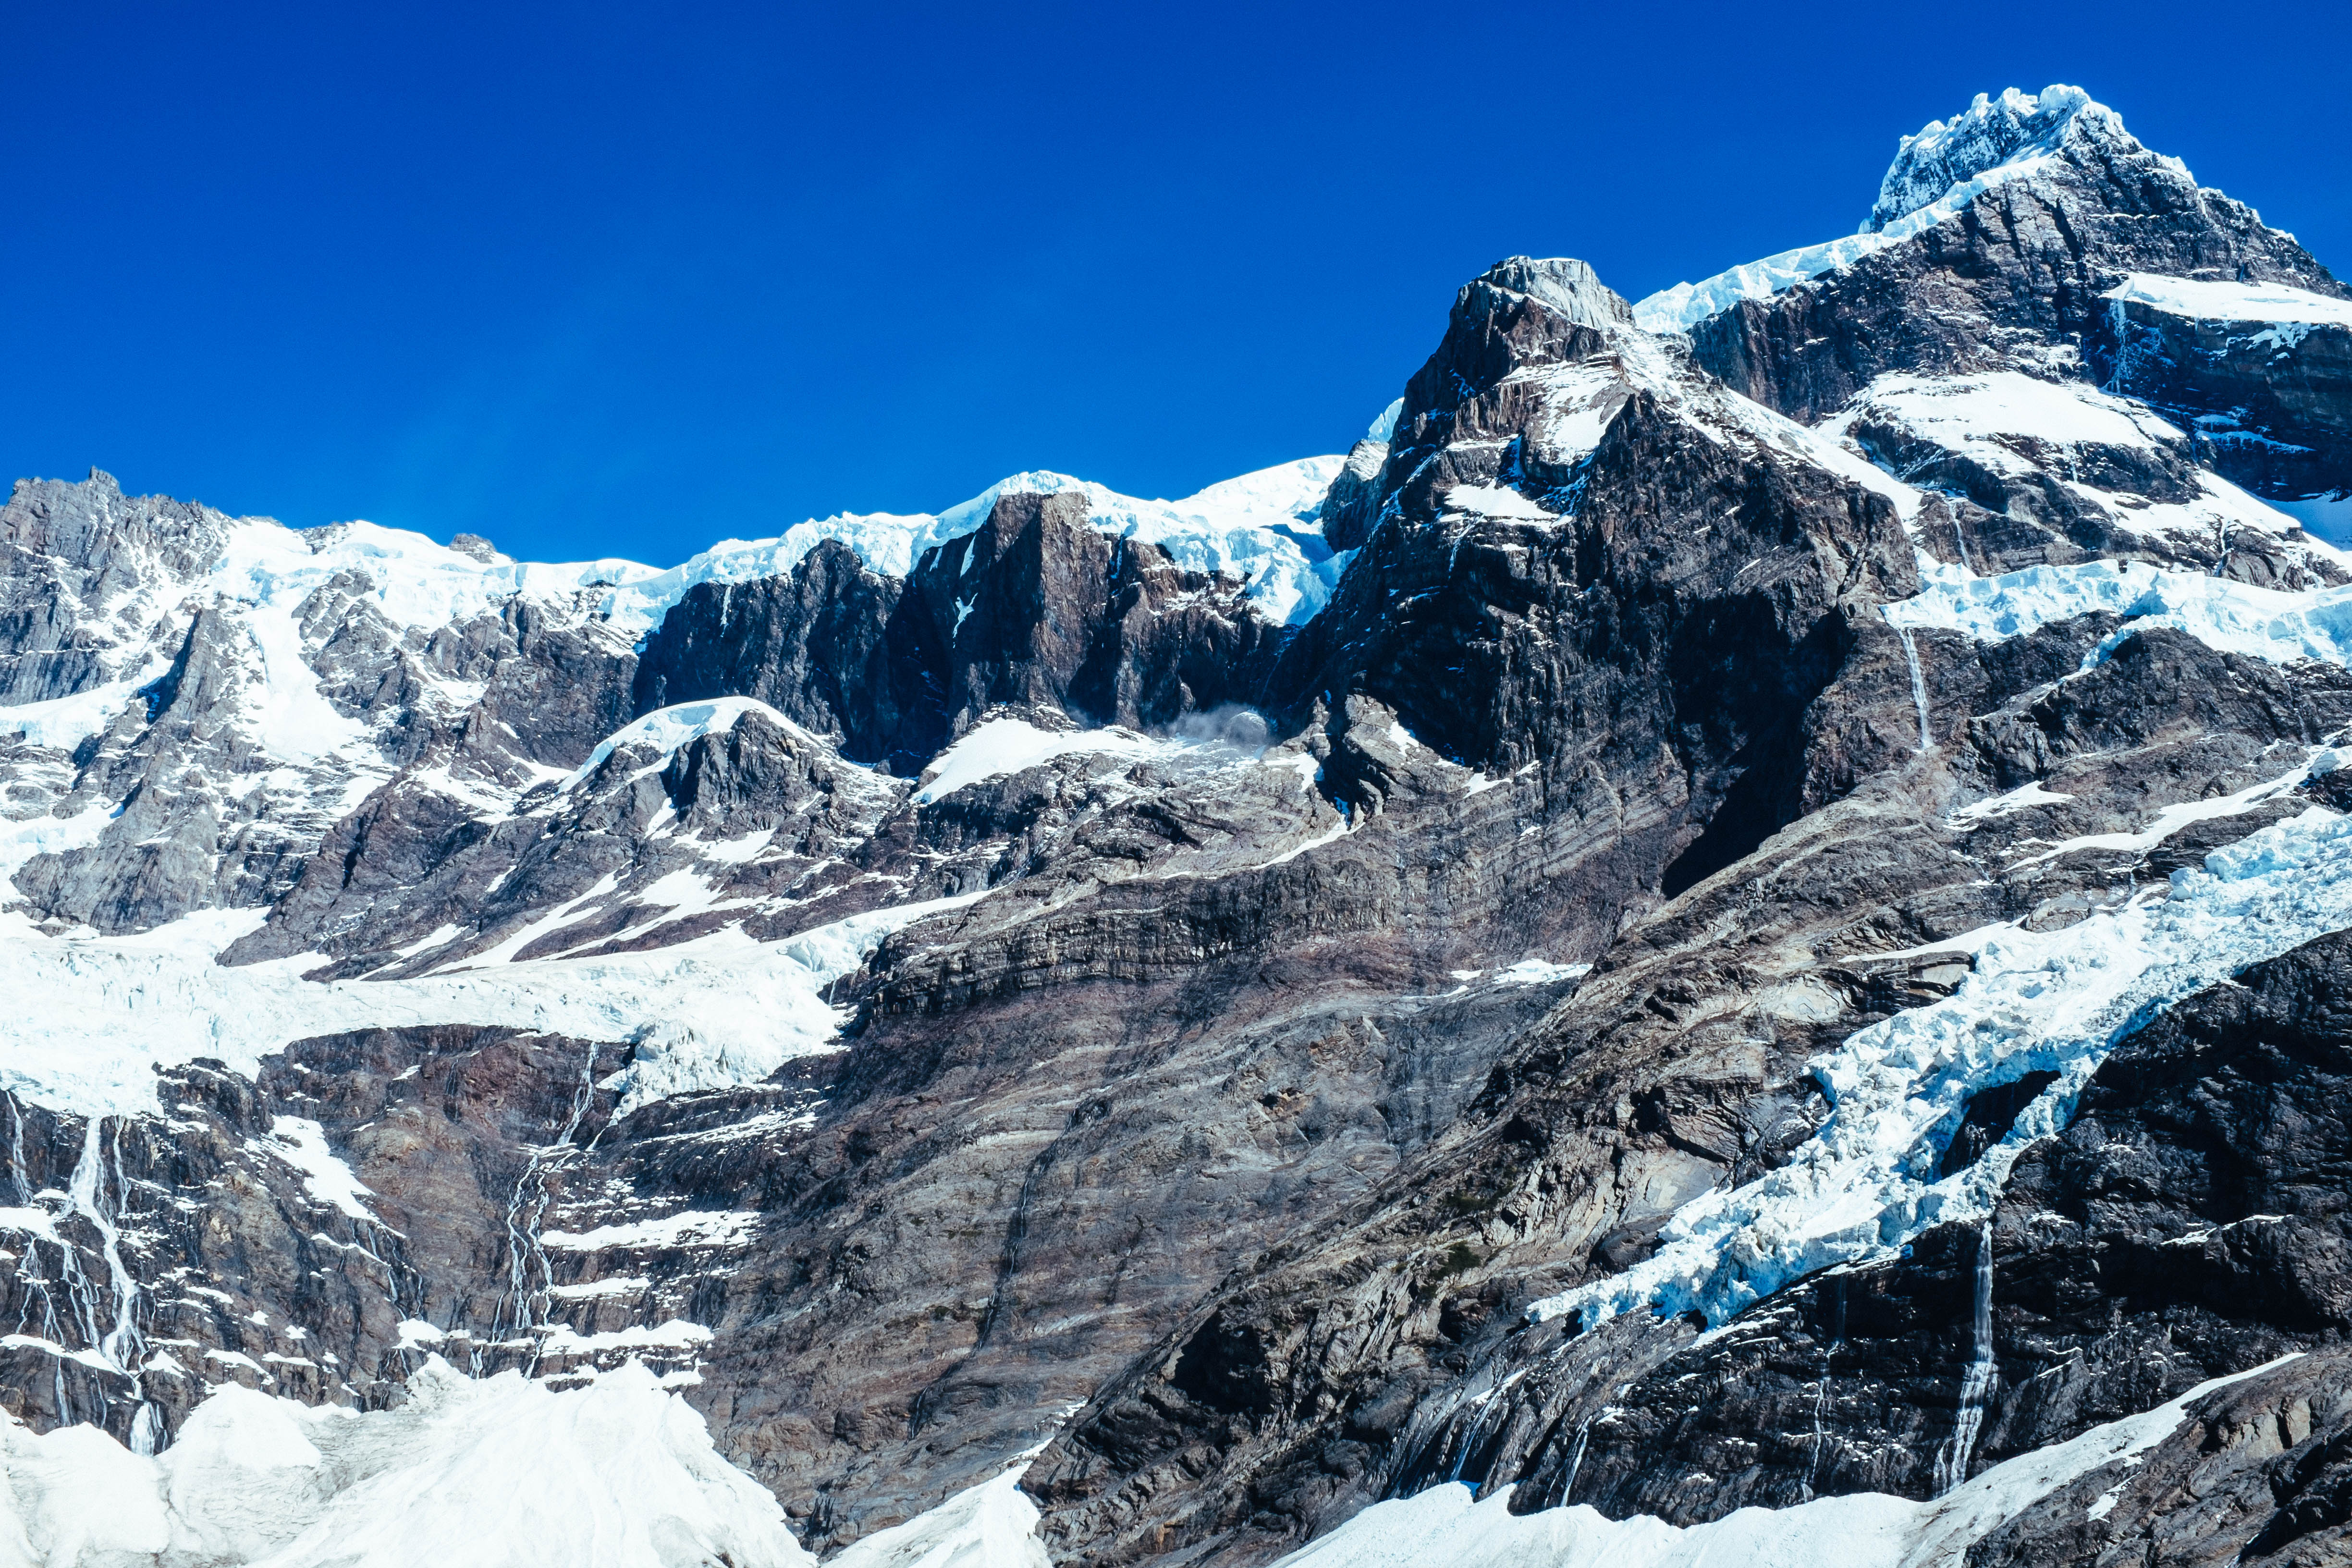
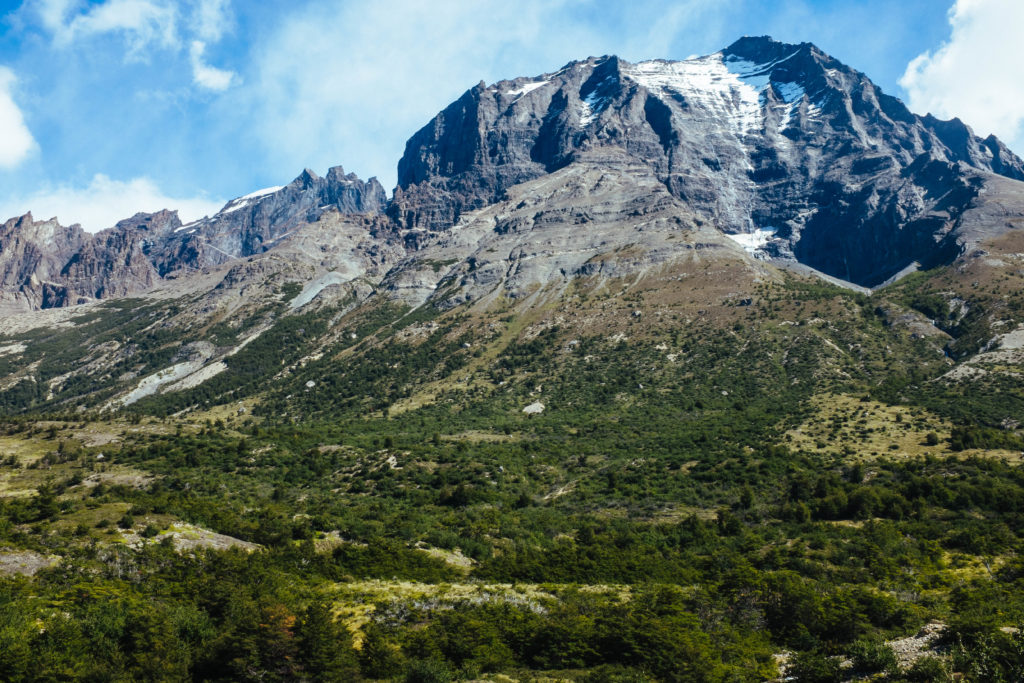
Moving on up the mountain left no shortage of hikers huffing and puffing. That moment of cresting the pass, and looking out onto the ice field for the first time… WOW! Absolutely remarkable. I dare say, awesome. Miles and miles of glacial ice spread out in every direction. Photos do not begin to convey the depth and expansiveness of this location. If you are on the fence about doing the O or the W, you can only get to this point by doing the O, and I dare say it makes every step worth it.
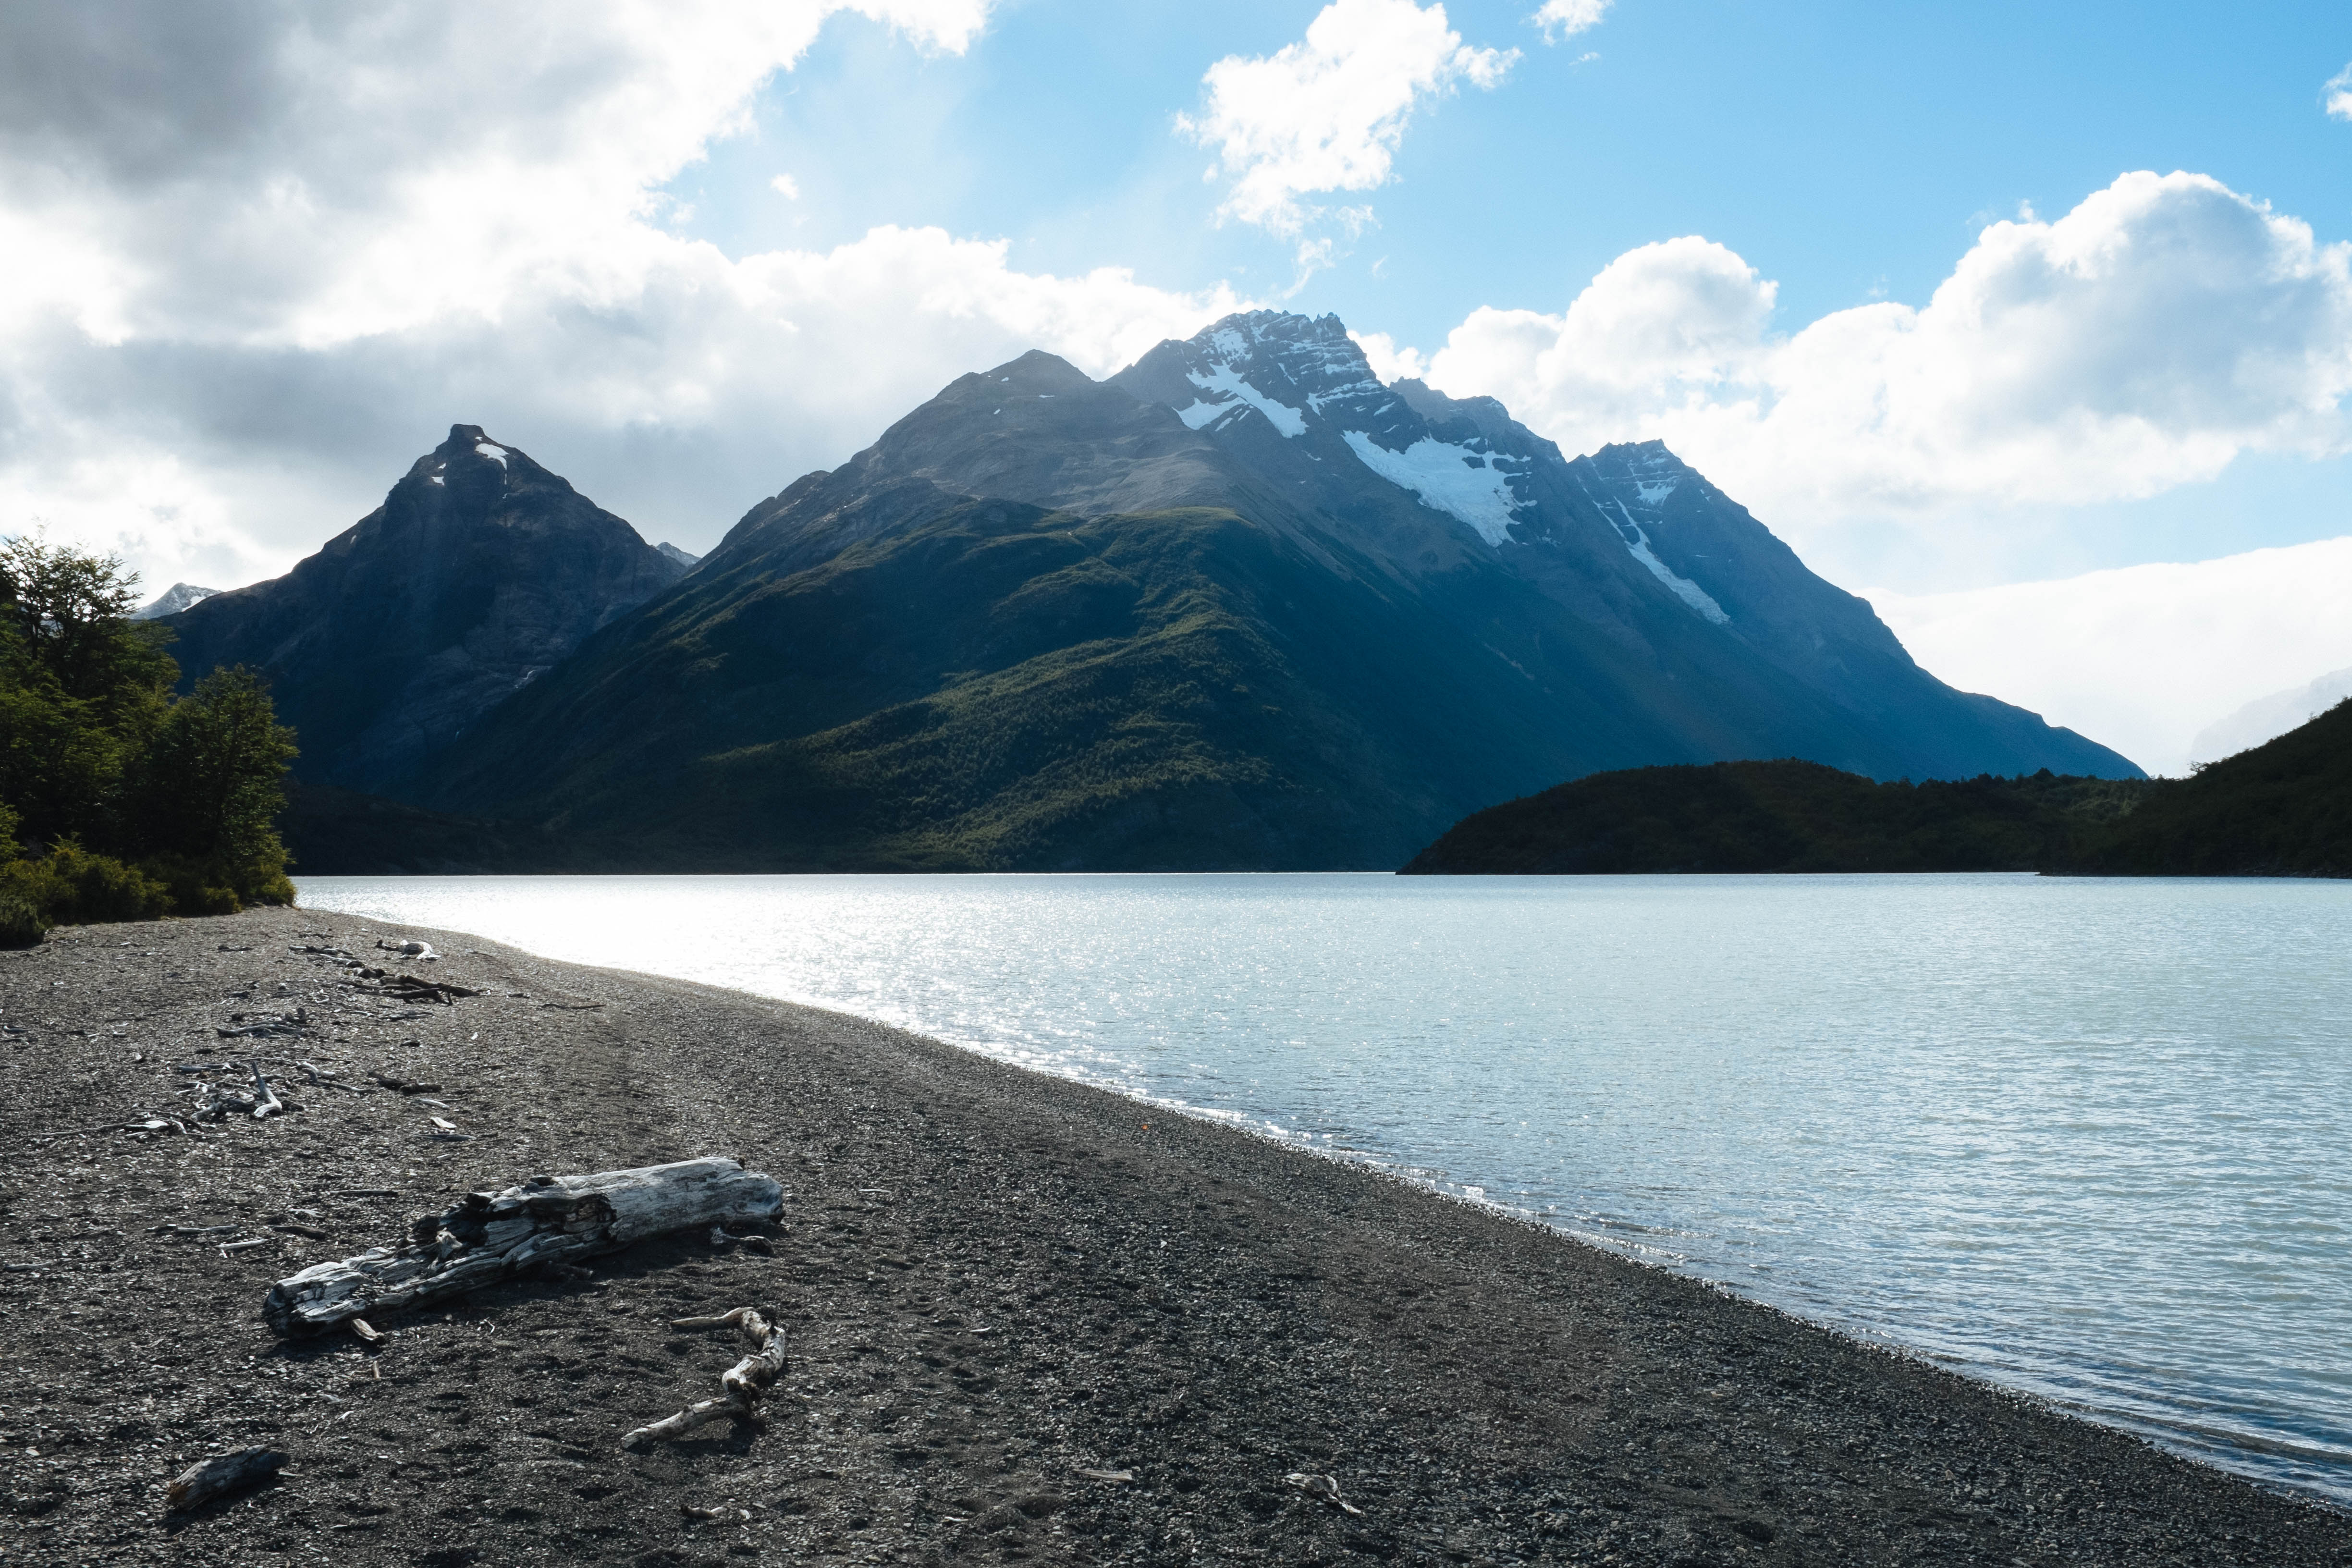
Day 5: Grey to Paine Grande (11km, 3.5 hours)
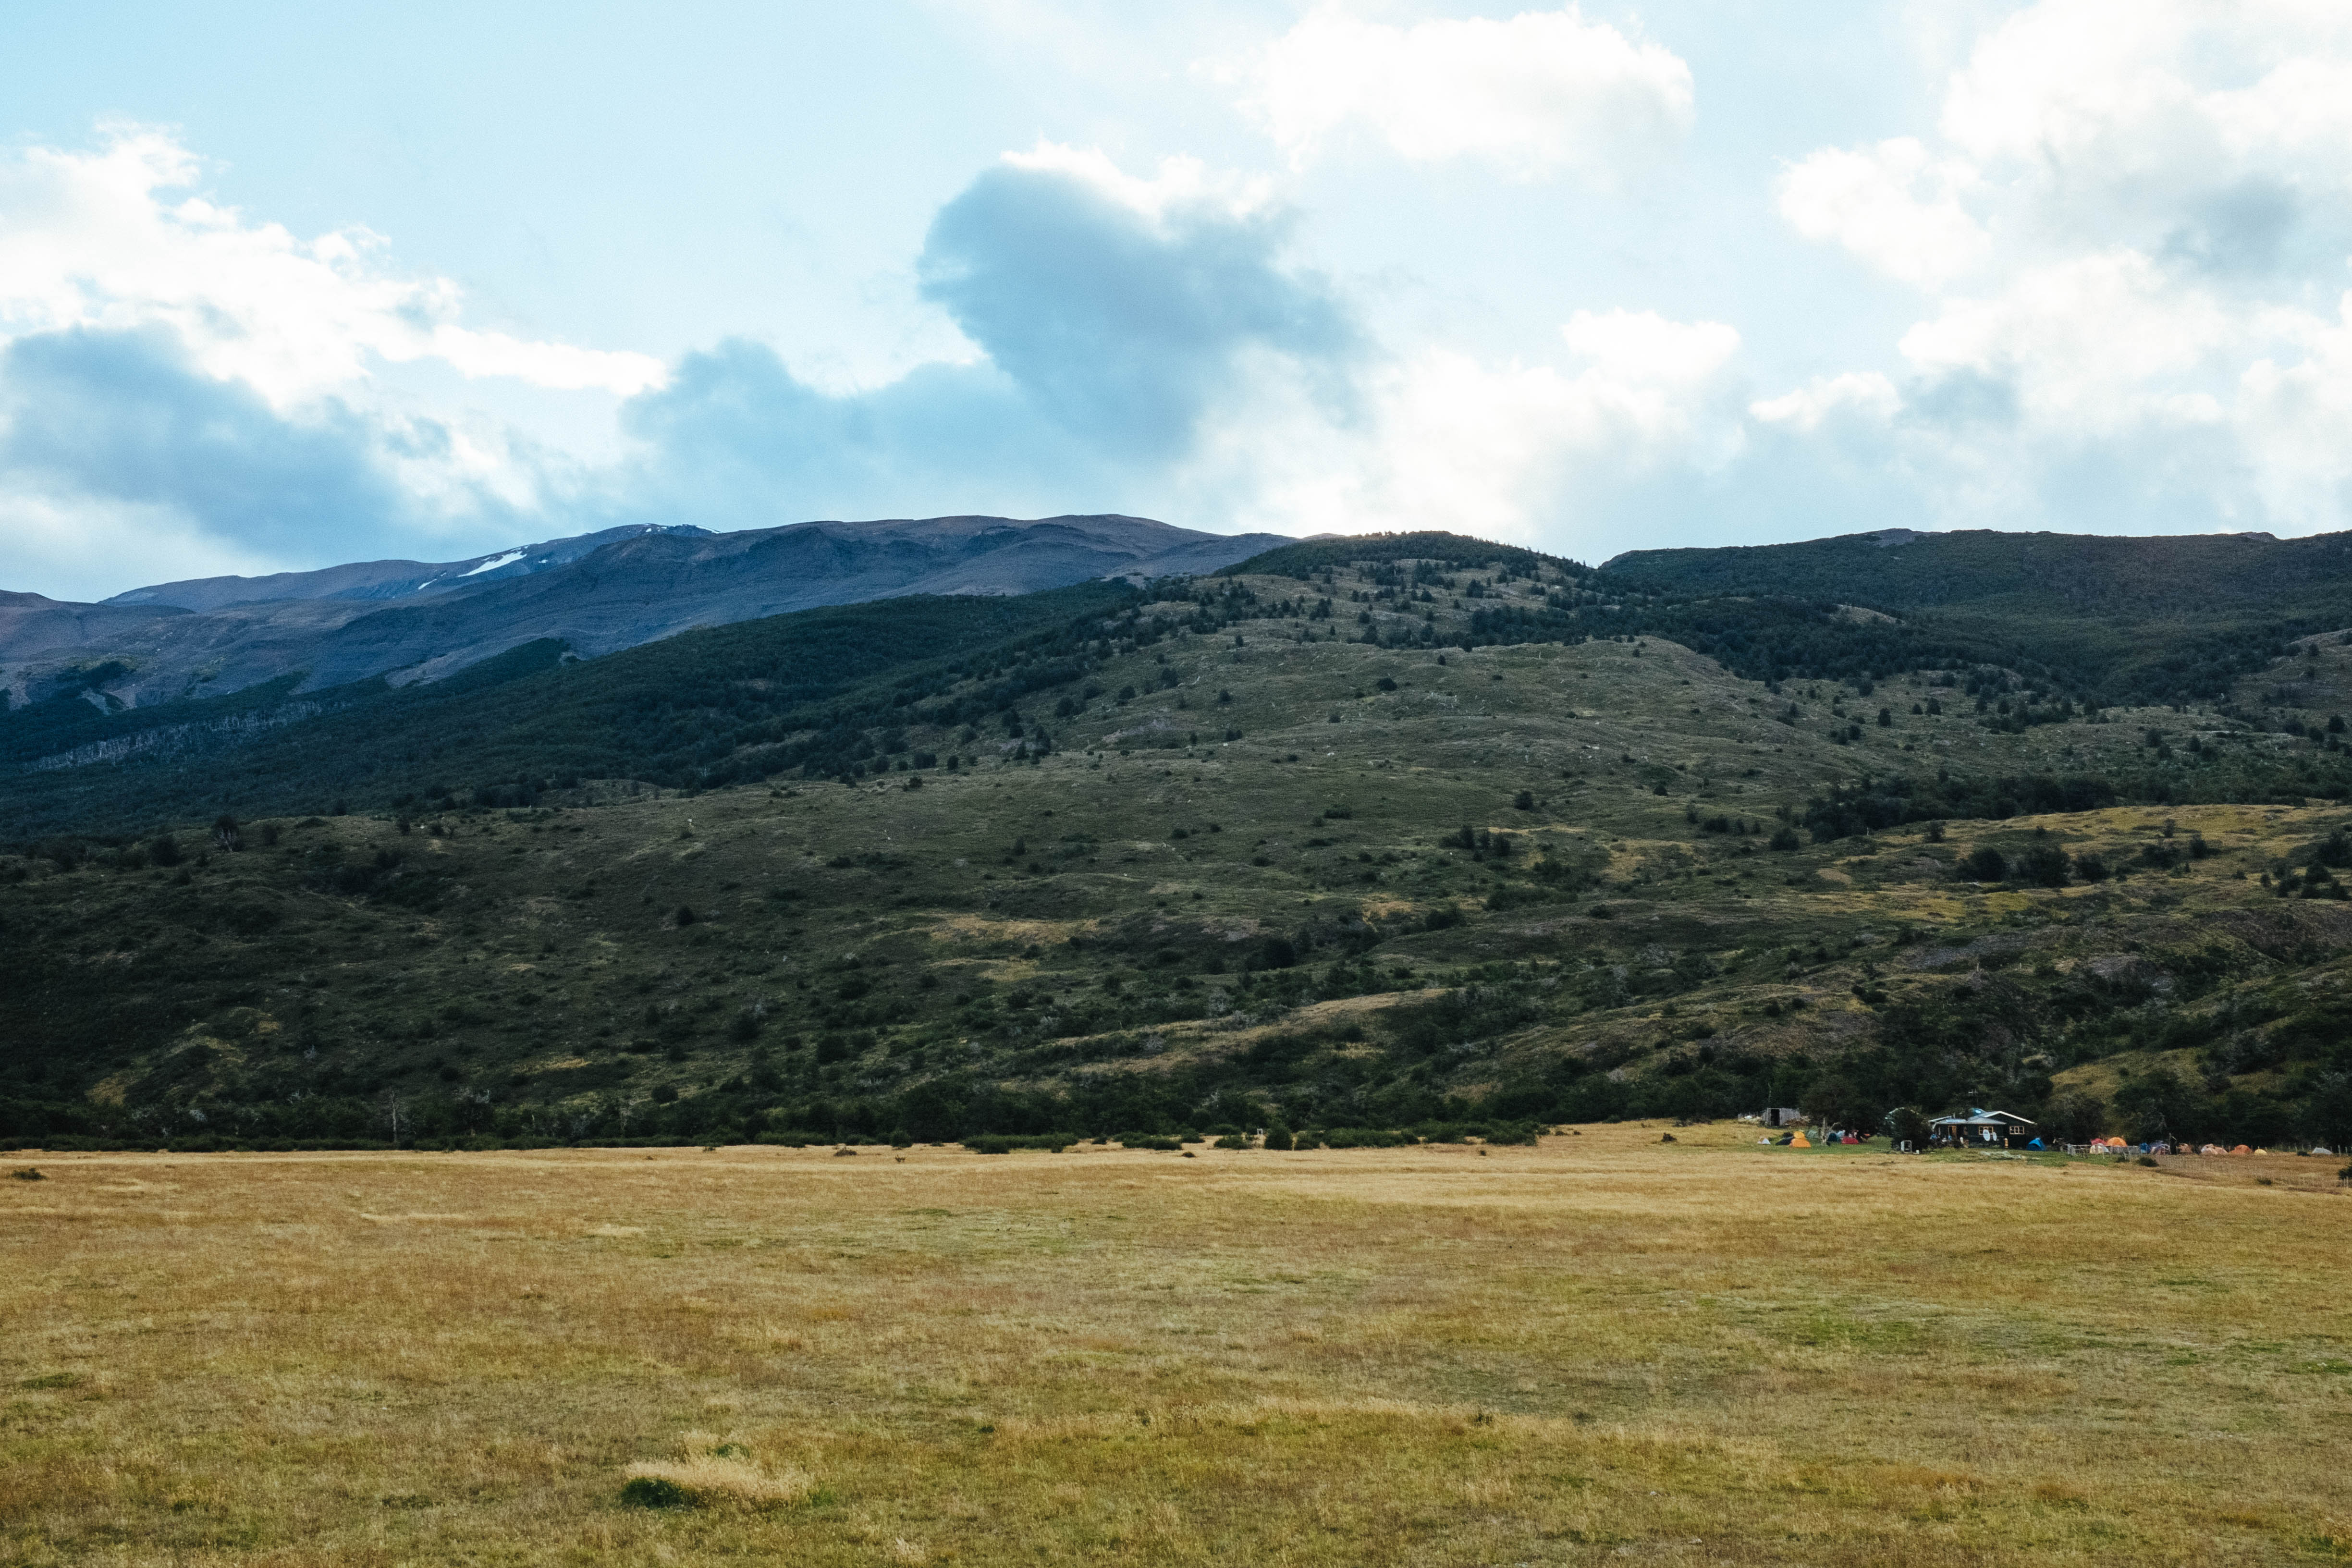
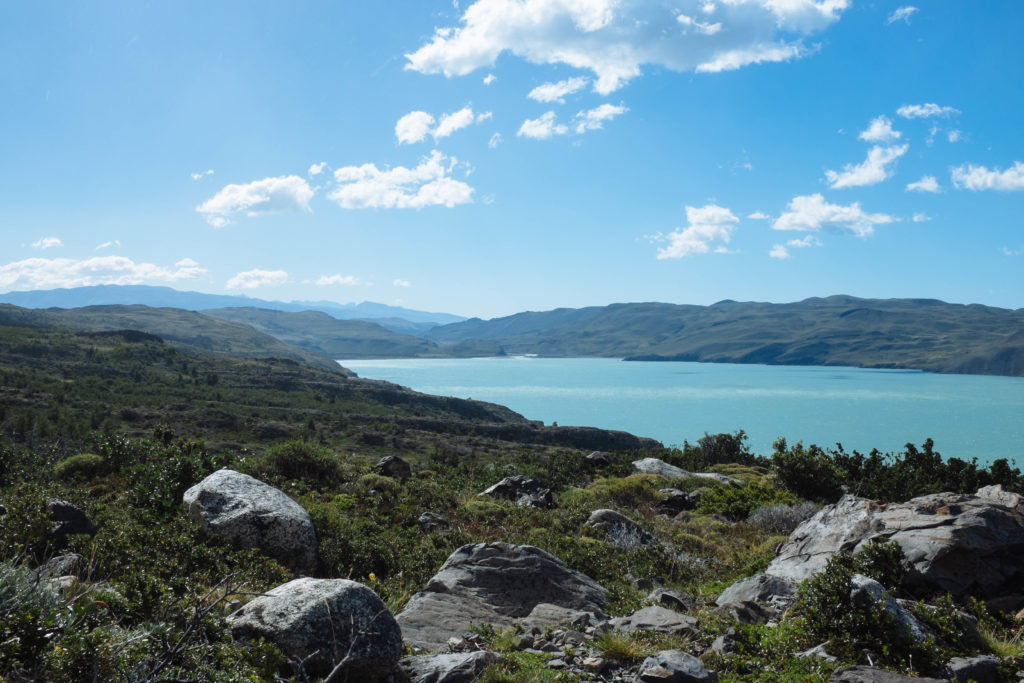
Paine Grande was my favorite campsite from the circuit due to the insanely gorgeous location. Having a bit of sunshine was welcomed in a major way, too. I remember standing in a brisk wind with my tent, bidding adieu to all of the collected moisture from the past few days. Sweet freedom! The campsite is sandwiched between a beautiful mountain backdrop, and a glacial lake with the most ethereal blue-green hues.
Paine Grande is where the catamaran picks up and drops off passengers and is a frequent starting point for hiking the W. You start to notice a change in the style of hiker once arriving to this point. Gone are the big bulky backpacks weighed down with days worth of supplies, and in are the day-packs paired with fresh legs and movements that have not encountered the pass.
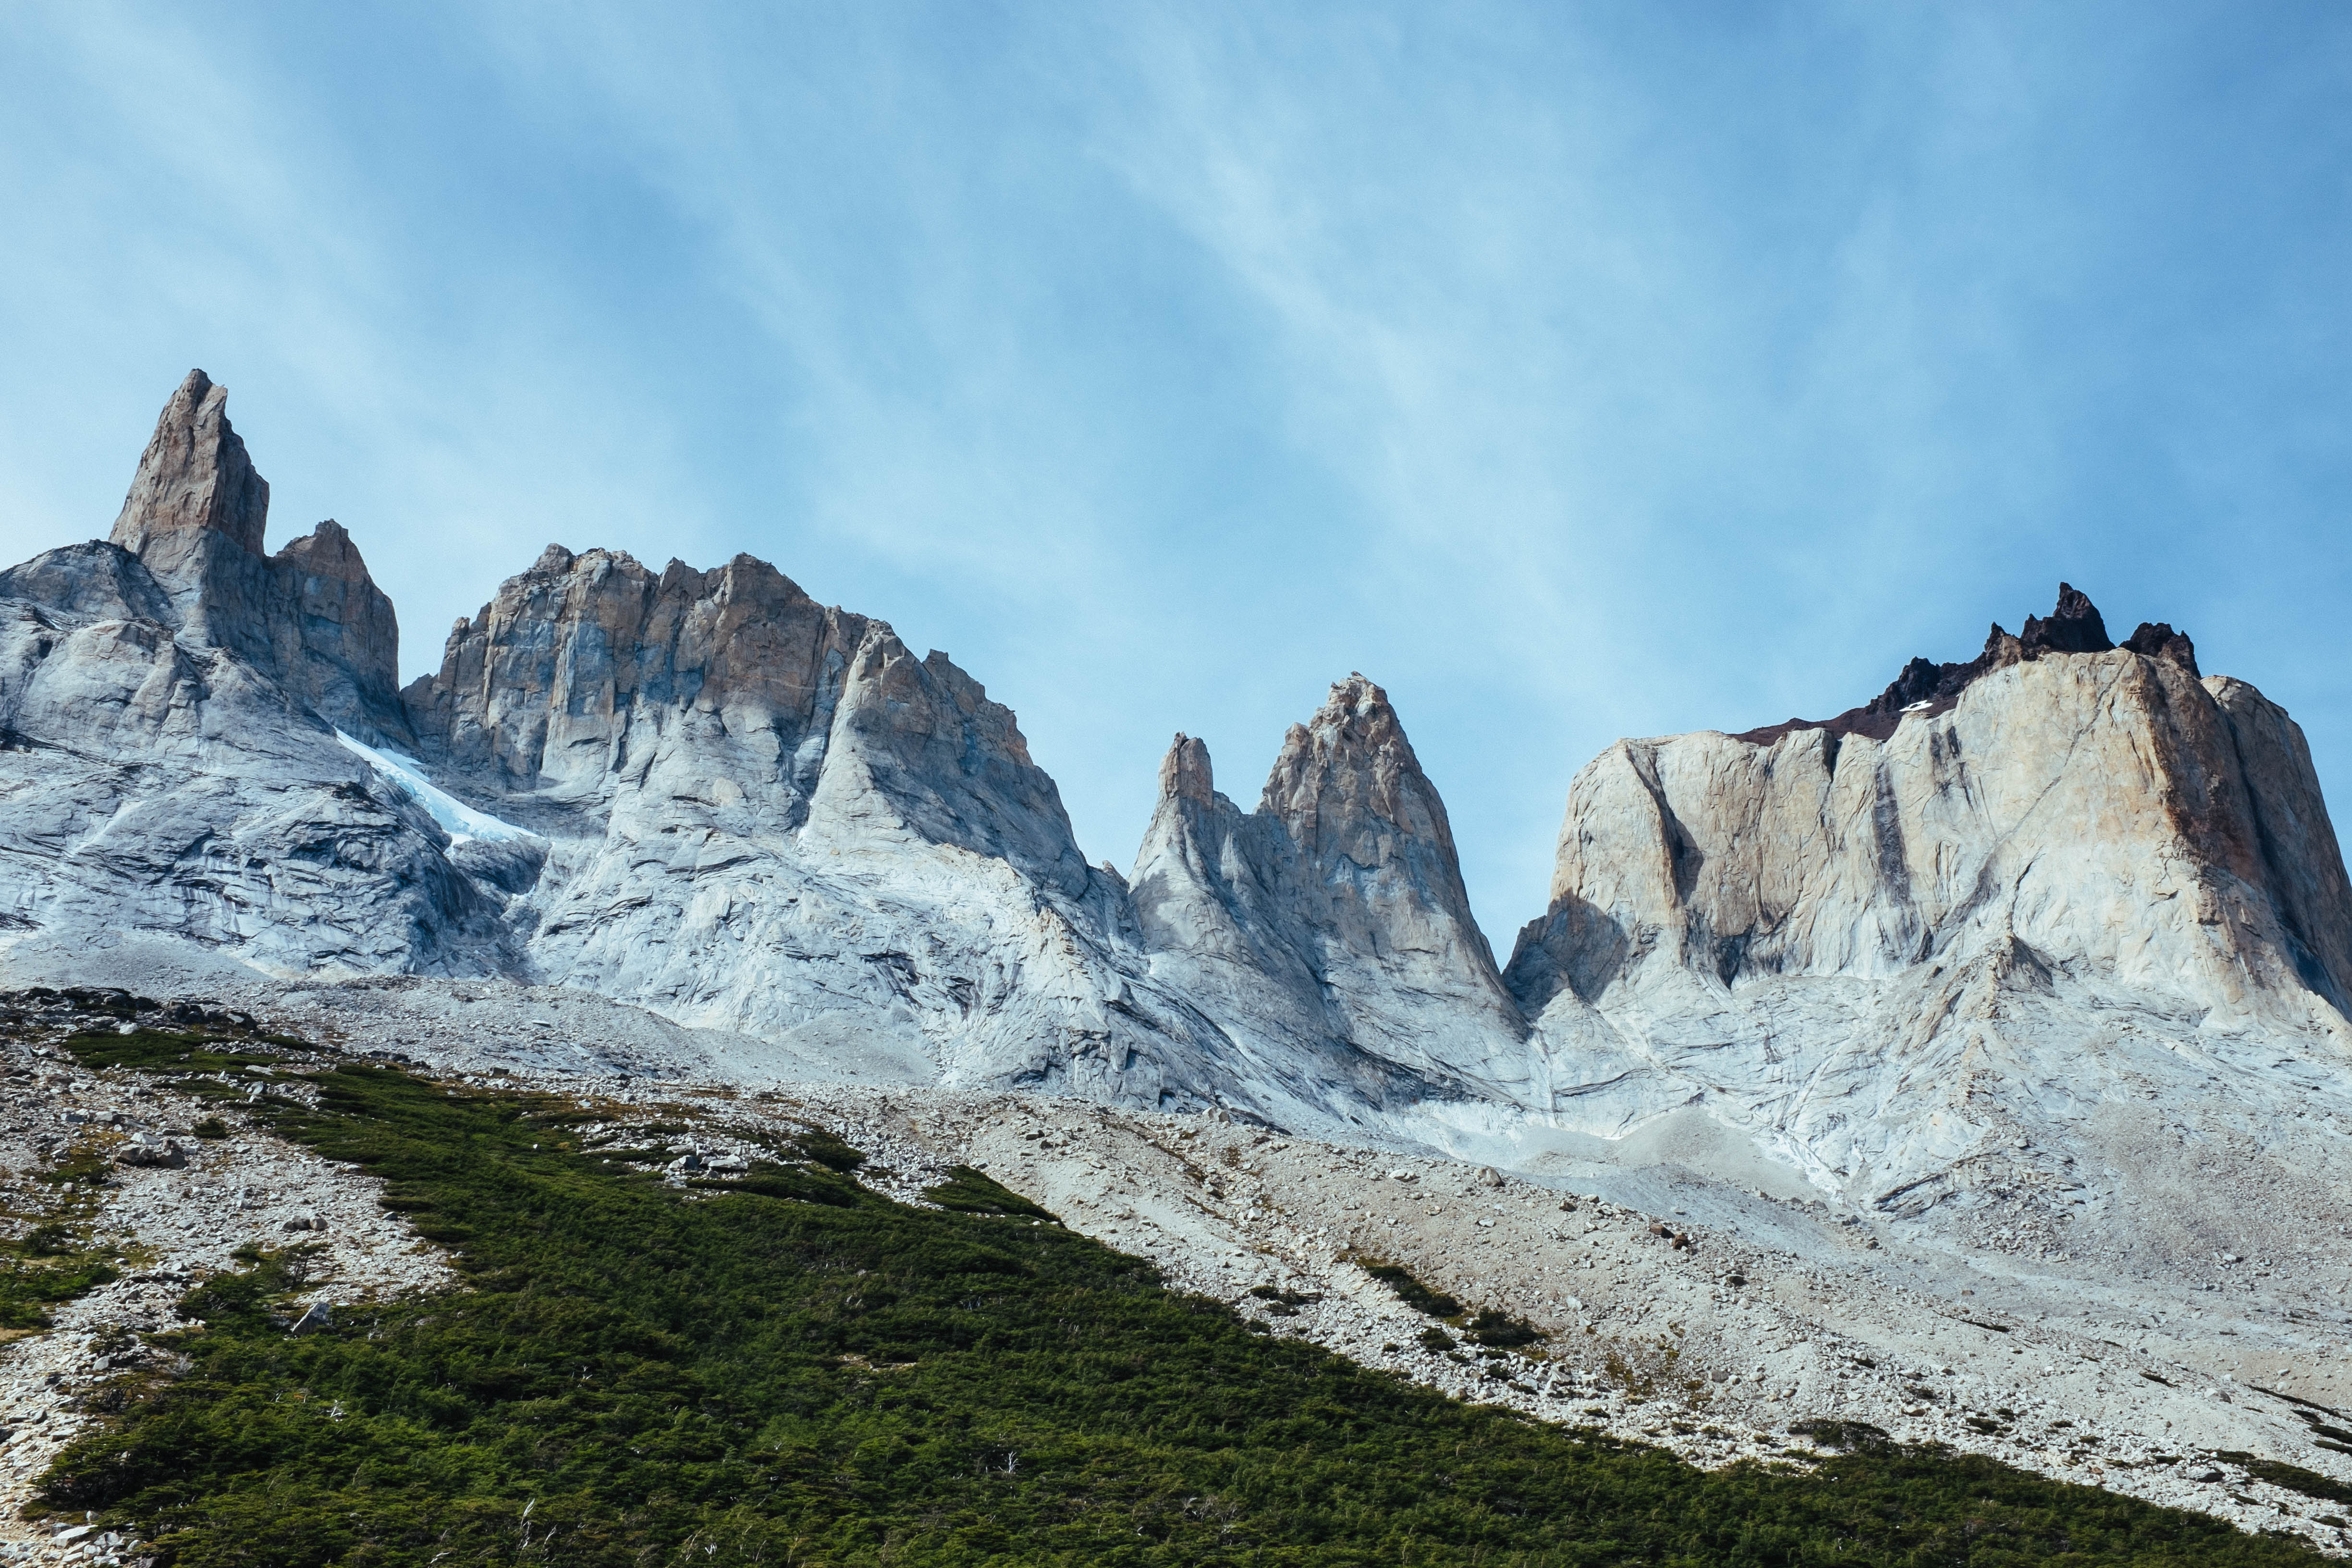
Day 6: Paine Grande to Frances Valley to Los Cuernos (23km, 11 hours)
Oh, boy. This was a long day. It didn’t have to be, but due to available campsites and my inability to ever say no to a great view, miles were made. Is it worth it to go up into the Frances Valley? 100%. There are two miradors, and both offer great views, but if your body is begging for mercy, stopping at the first mirador is a-okay. Weather cooperated again this day, and I was all about scurrying up into the valley. I met a couple who had traveled her the year prior, and couldn’t even access the valley due to weather. Definitely wouldn’t want to take a good weather day for granted.

Day 7: Los Cuernos to Chileno (16km, 6.5 hours)
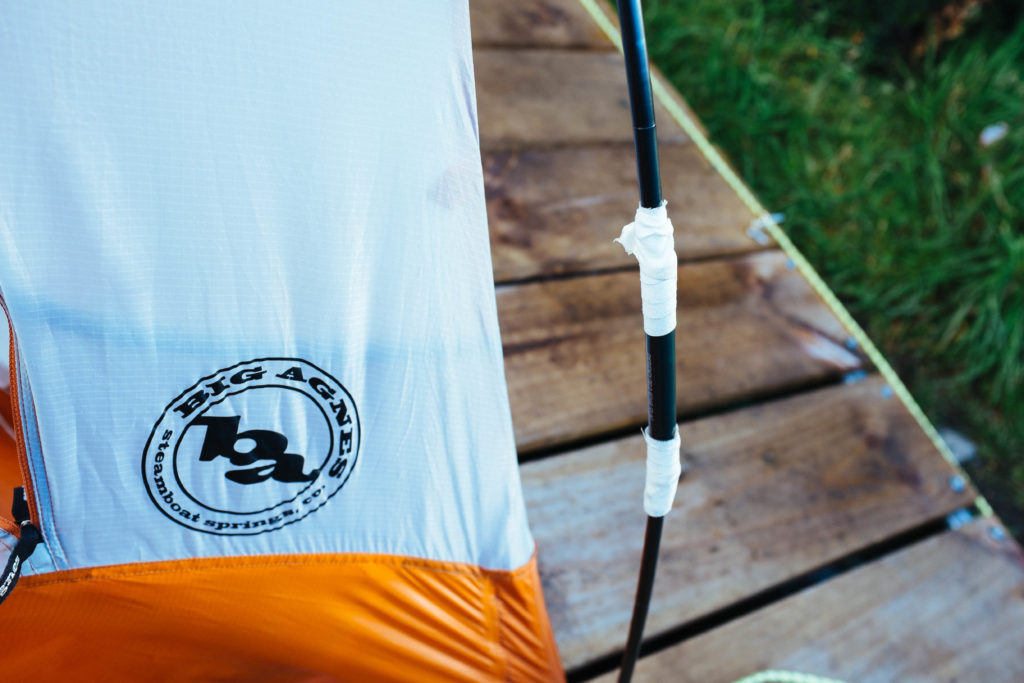
Goodness gracious, Los Cuernos is a campsite that I will never forget. The thing you read about online, about how Patagonian winds are a force to be reckoned with? I assure you that it is most certainly a real thing. I got absolutely walloped in the middle of the night, due to me being a doofus. When questioning if you should tie your tent down, or weigh it down internally with gear and stones, tie it down. Always tie it down.
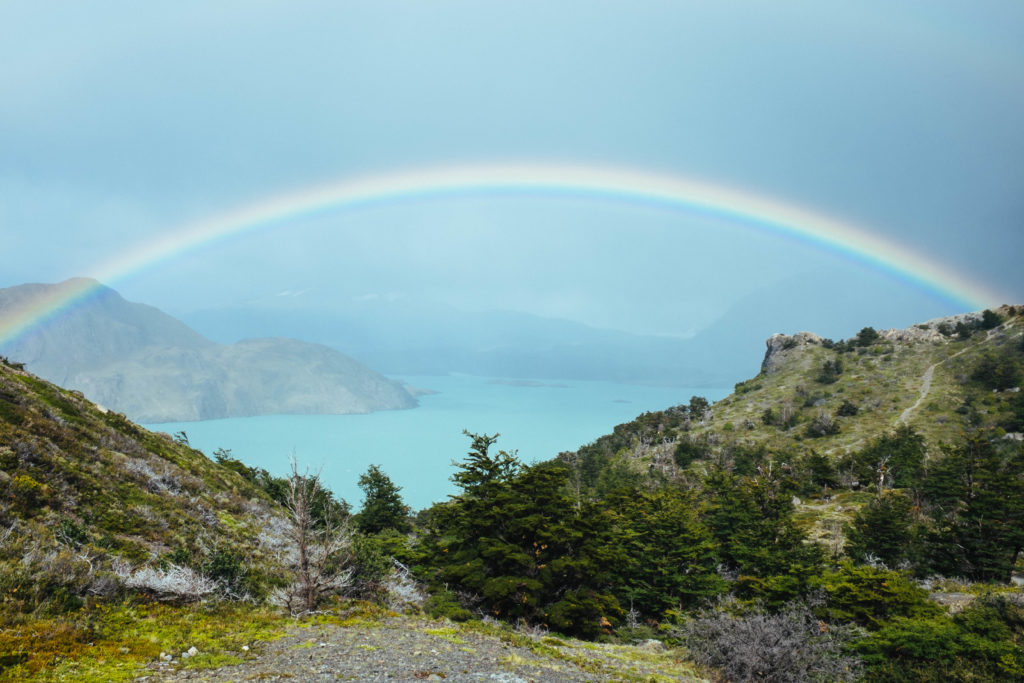
The moment I took my body weight off the tent in the middle of the night, my tent went sailing. I was luckily able to grab it as it took off, which instantly snapped one of the poles. As I fumbled with my head lamp and emergency splint, an angel man appeared out of no where with tape and rope to help me secure my flapping mess of a sleeping arrangement. This dude absolutely saved my ass. If it wasn’t for him, I might very well still be tumble-weeding my way around the Patagonian country side. The next day Torres del Paine offered an amazing rainbow, as if to say, “Sorry, about last night.” All is forgiven, Torres del Paine.
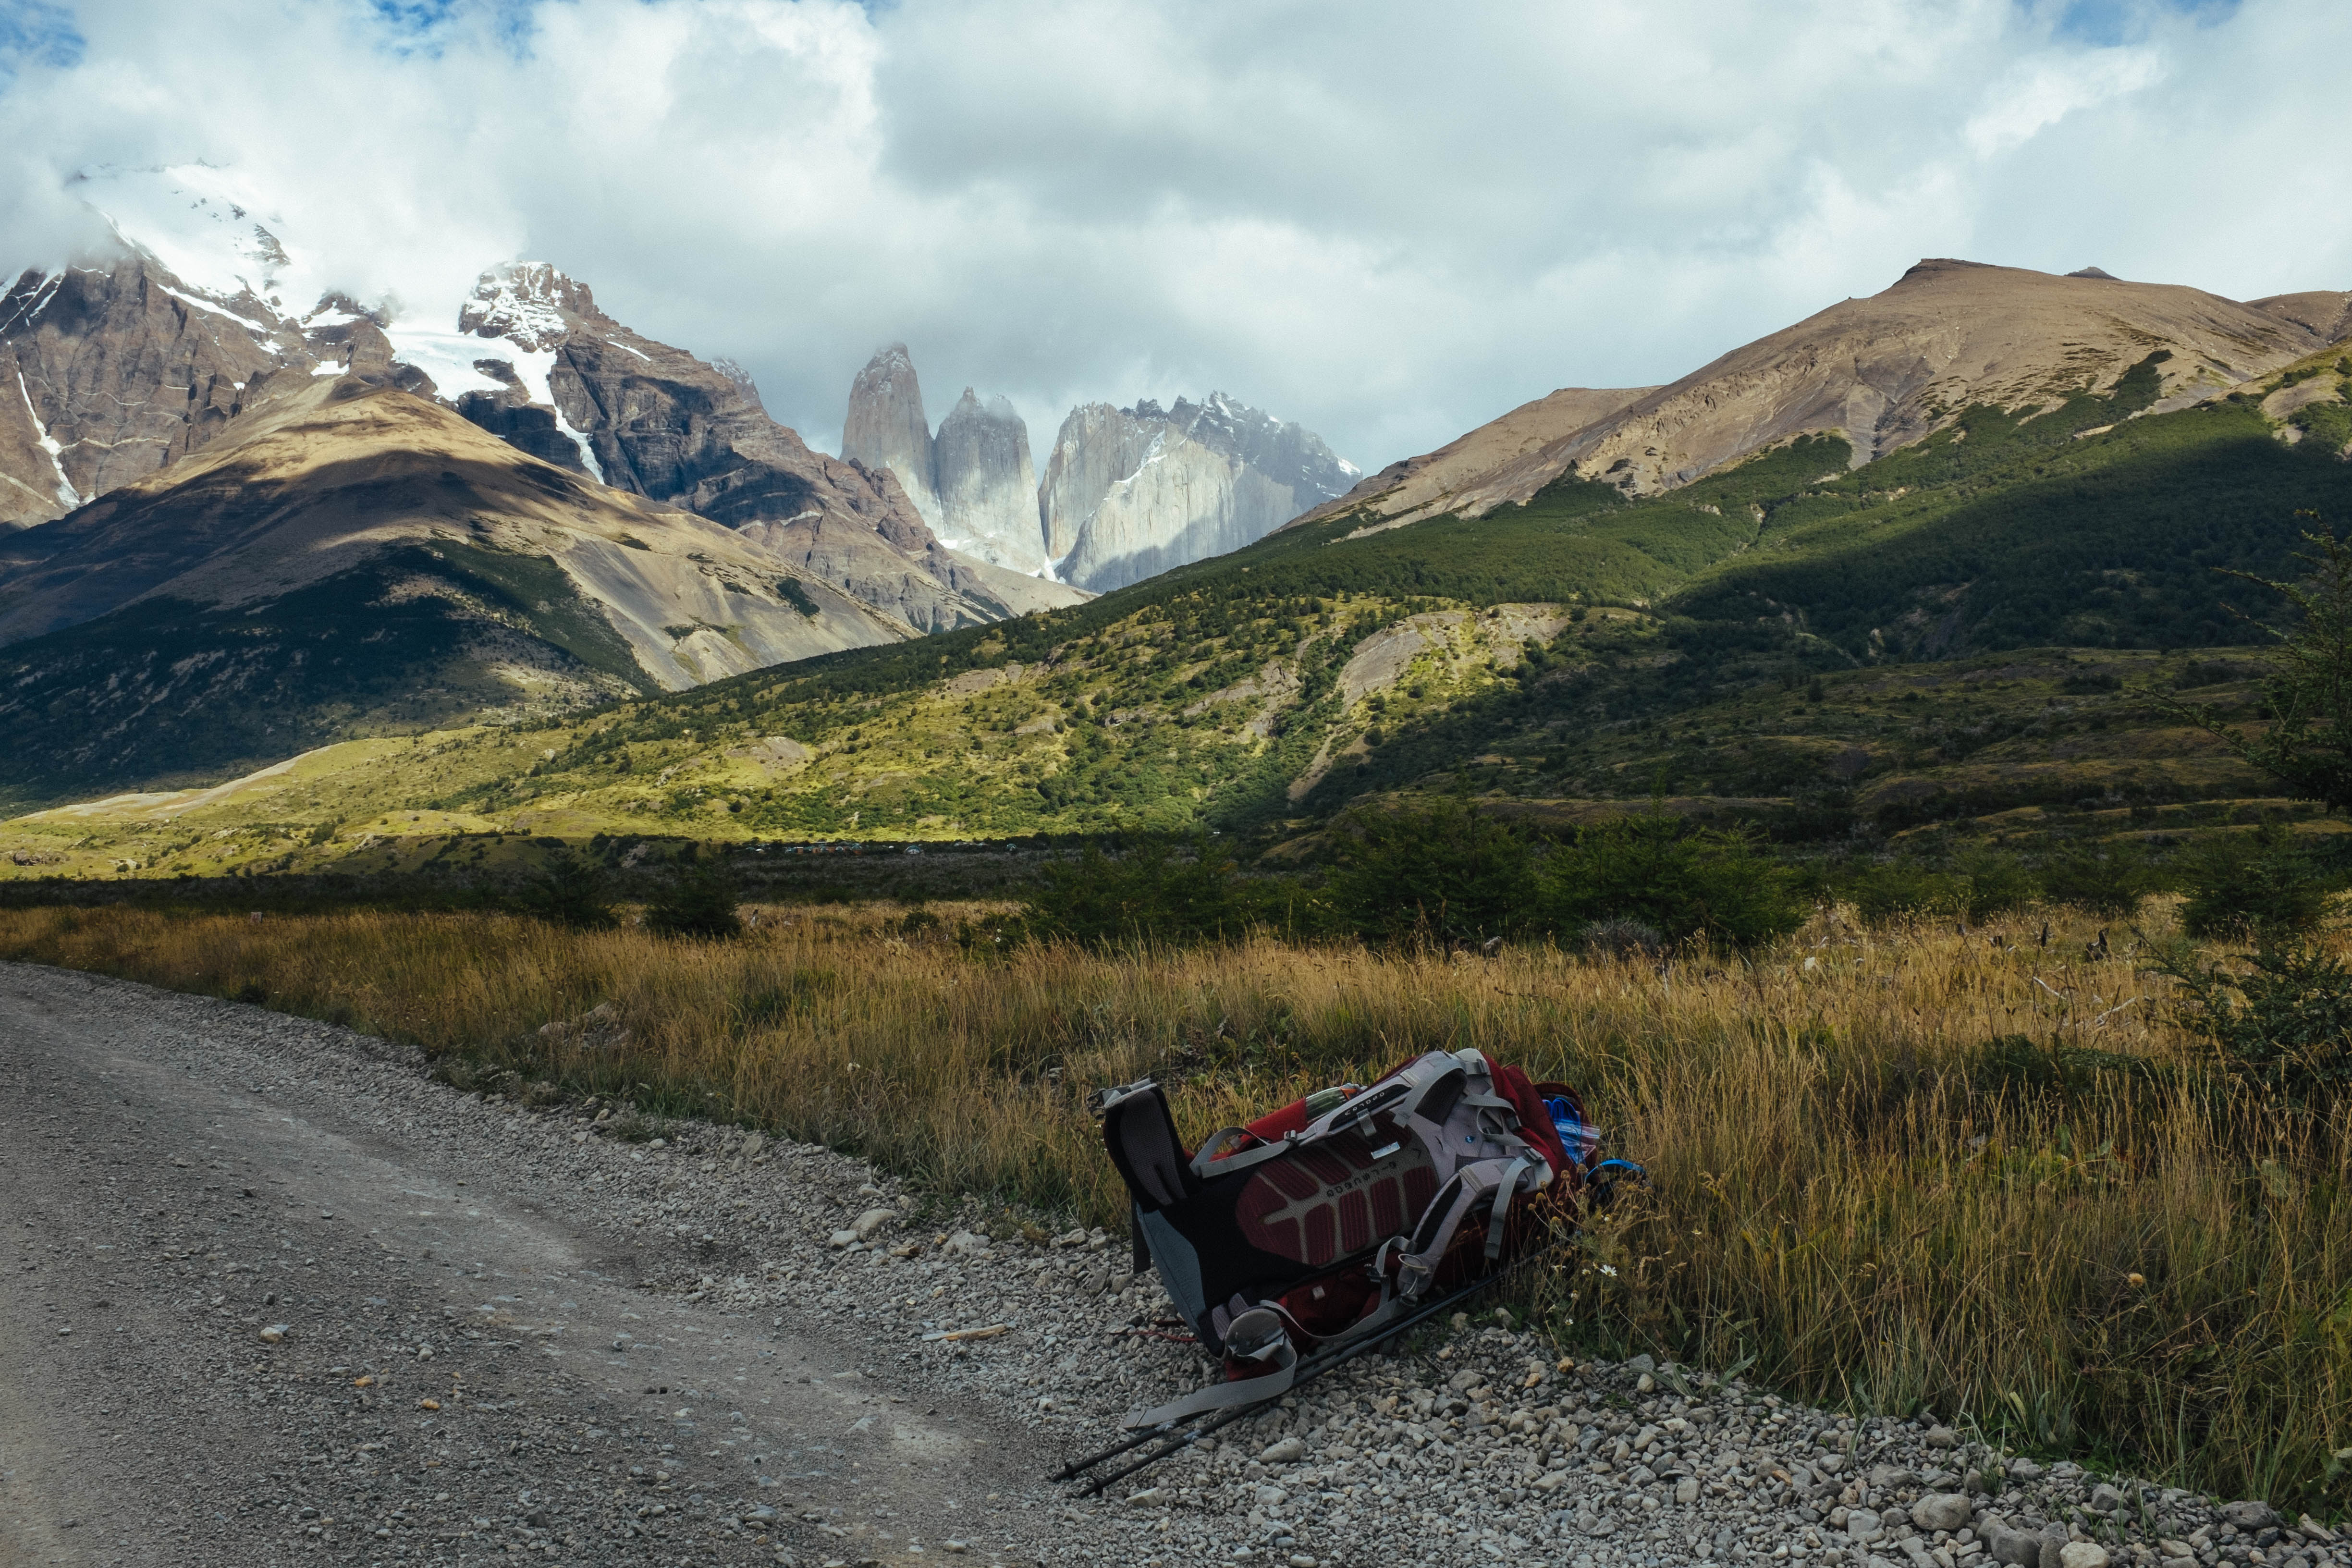
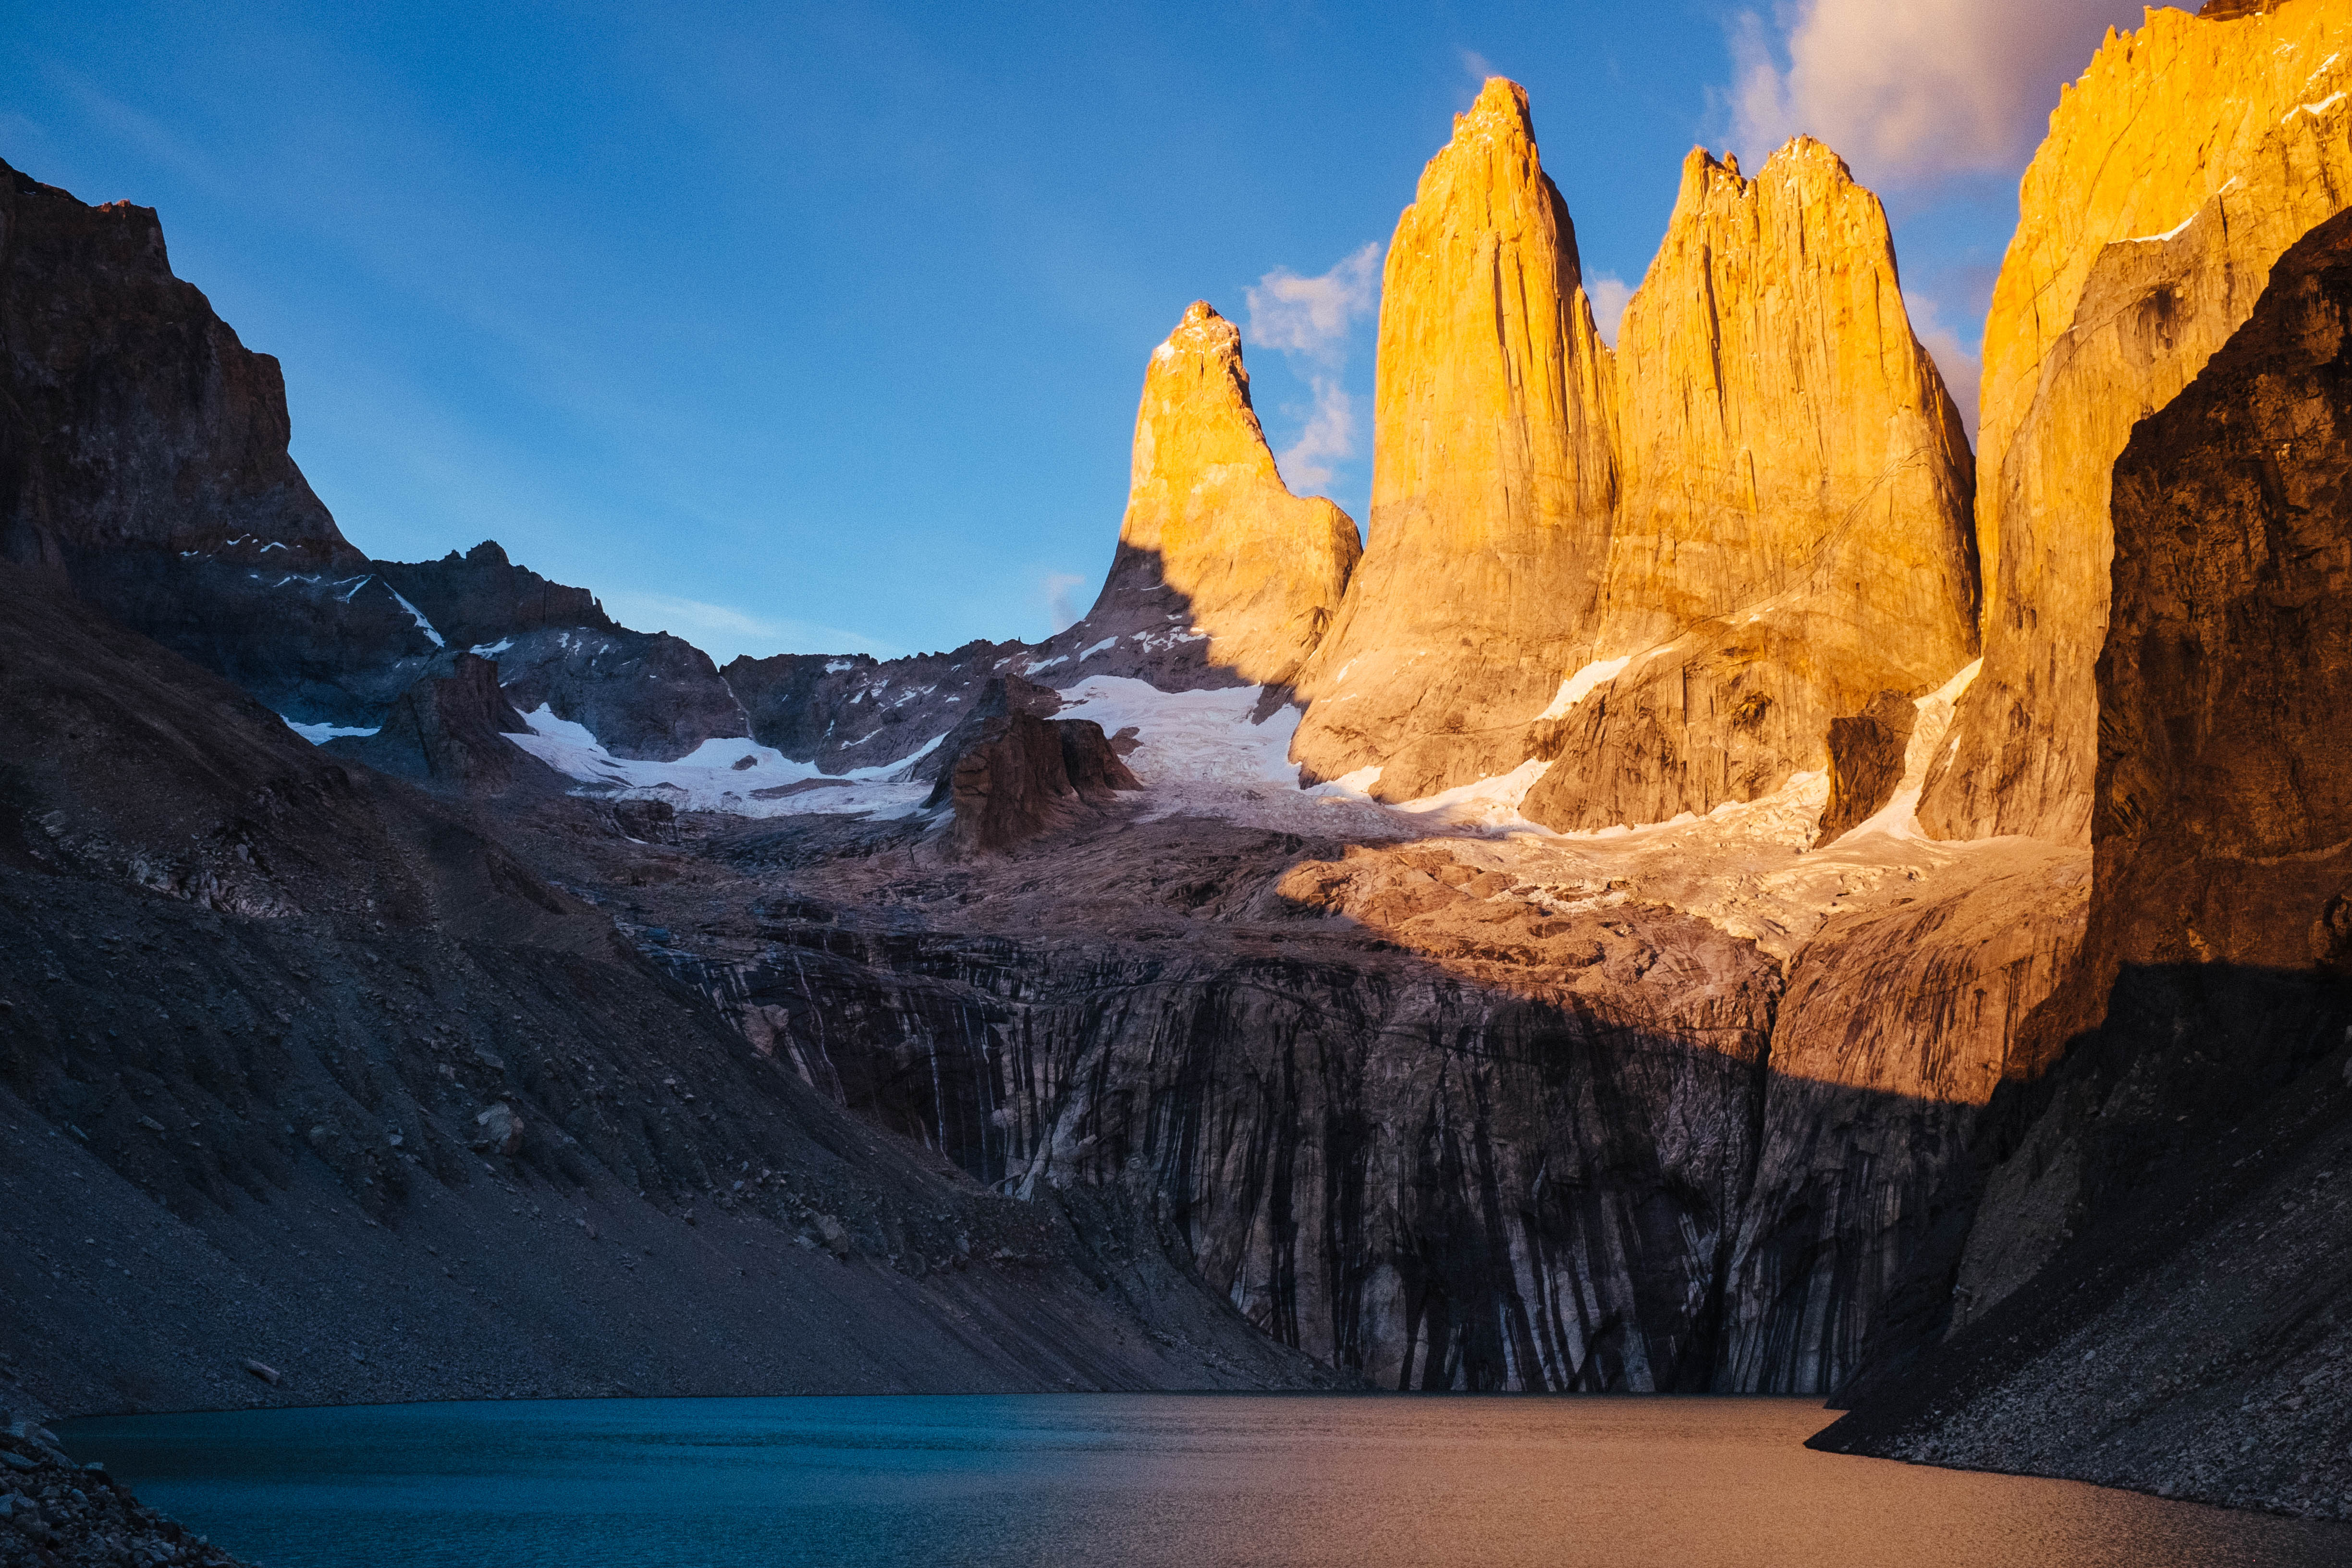
Day 8: Chileno to Torres del Paine to Laguna Marga to Puerto Natales (11km, 6 hours)
This sounds more complicated than it actually is. If you camp out at Chileno (or Torres) you can wake up in the morning and scamper up the hill to catch the sunrise. From Chileno it’s about a 1.5 hour walk in the dark, so bring your head lamp. A smart person would bring their sleeping bag with them, along with a thermos of coffee to better enjoy the sunrise, as you’re covered in sweat by the time you get to the top, and it’s pretty cold. When you are done there, head back to Chileno grab your stuff, and walk back to the bus stop by the hotel to catch the shuttle back to Laguna Marga. You will already have your return ticket to catch the bus back. Don’t worry if they run out of space on your companies bus. They operate as a pack and will put you on another bus. Arrive back in town, enjoy a hot shower, and go find some asado, because you just did something pretty damn cool!
 There you have it! Hopefully you can glean something of use out of this big ol’ pile of words. Thank you to everyone who I shared a conversation with while hiking Torres del Paine National Park. If it wasn’t for your company while attempting this endeavor, I know my experience would have been vastly different. If you have any questions, don’t hesitate to get in touch, and I’ll do my best to offer some input. Happy hiking!